Buffalo MiniStation Thunderbolt Review - An External with USB 3.0 and Thunderbolt
by Brian Klug on August 1, 2012 4:04 PM EST- Posted in
- Storage
- SSDs
- USB 3.0
- Thunderbolt
- Buffalo
Part of what makes the Buffalo MiniStation Thunderbolt unique is the inclusion of USB 3.0 alongside, well, Thunderbolt. Going with a Thunderbolt only drive is admittedly a difficult prospect to swallow - what happens if your only Thunderbolt-packing computer dies, for example, and you need files on the drive? Having legacy interfaces is just something everyone has grown accustomed to, and what that usually ends up meaning is that USB needs to be onboard.
Buffalo told me that they worked with Intel and Apple to develop a switching system for deciding which controller to switch SATA from the drive to, and that this system is unique to the MiniStation Thunderbolt for now. To find out more, I had to open up the drive. To be honest, well, I was always going to open the enclosure…
I wager a lot of other potential customers are interested in putting an SSD inside the MiniStation Thunderbolt and taking advantage of the interface’s basically native transfer speeds. Unfortunately, getting the MiniStation apart is somewhat challenging. Disassembly starts by prying the top plastic cover off, which is connected via plastic clips to the drive tray, which is in turn adhered to the aluminum base with some sticky double sided foam tape.
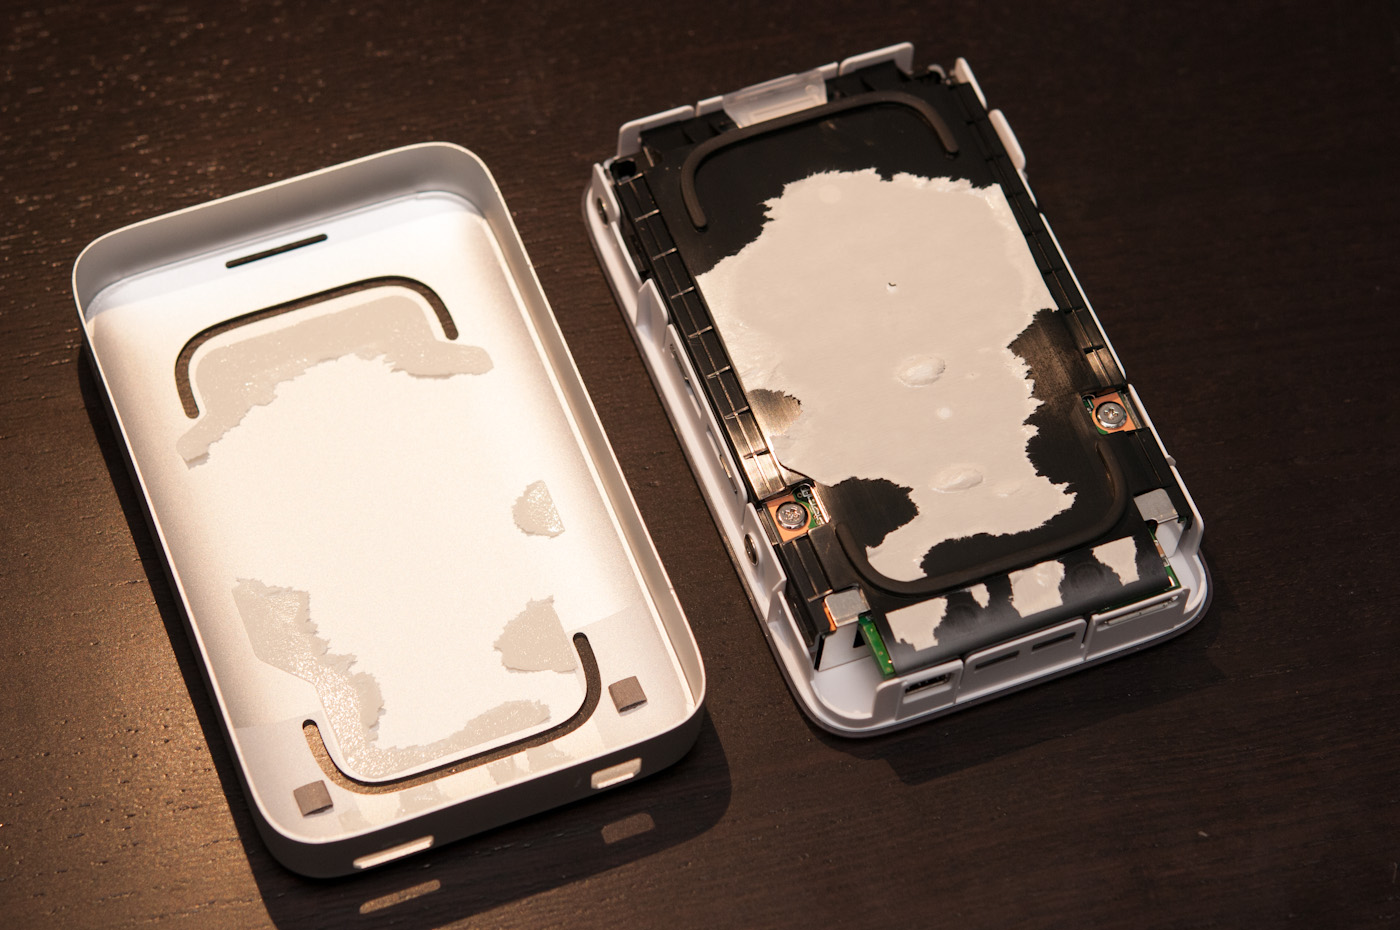
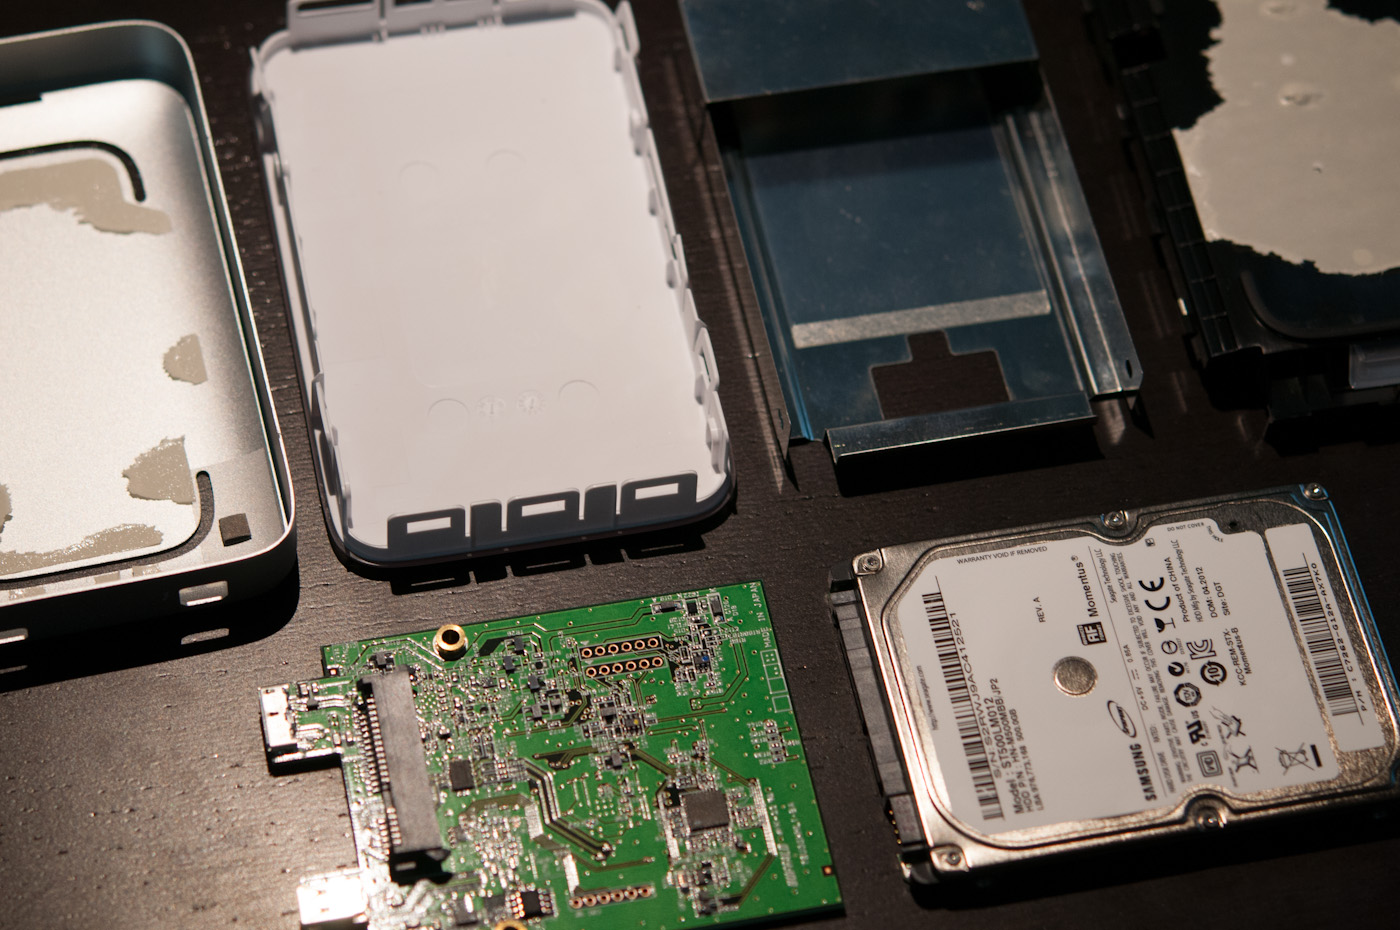
I ended up having to apply a lot of force to separate things, and for me the adhesive was what gave first while prying on the top part of the drive. Armed with this knowledge, people trying to take apart the drive assembly should probably heat the underside with a heat gun before prying the top off with a plastic opening tool. After this comes up, there are plastic clips and a few screws in your way securing the drive to a plastic cage. It’s clear the black part sits in the aluminum tray, and the top white plastic part snaps over this.
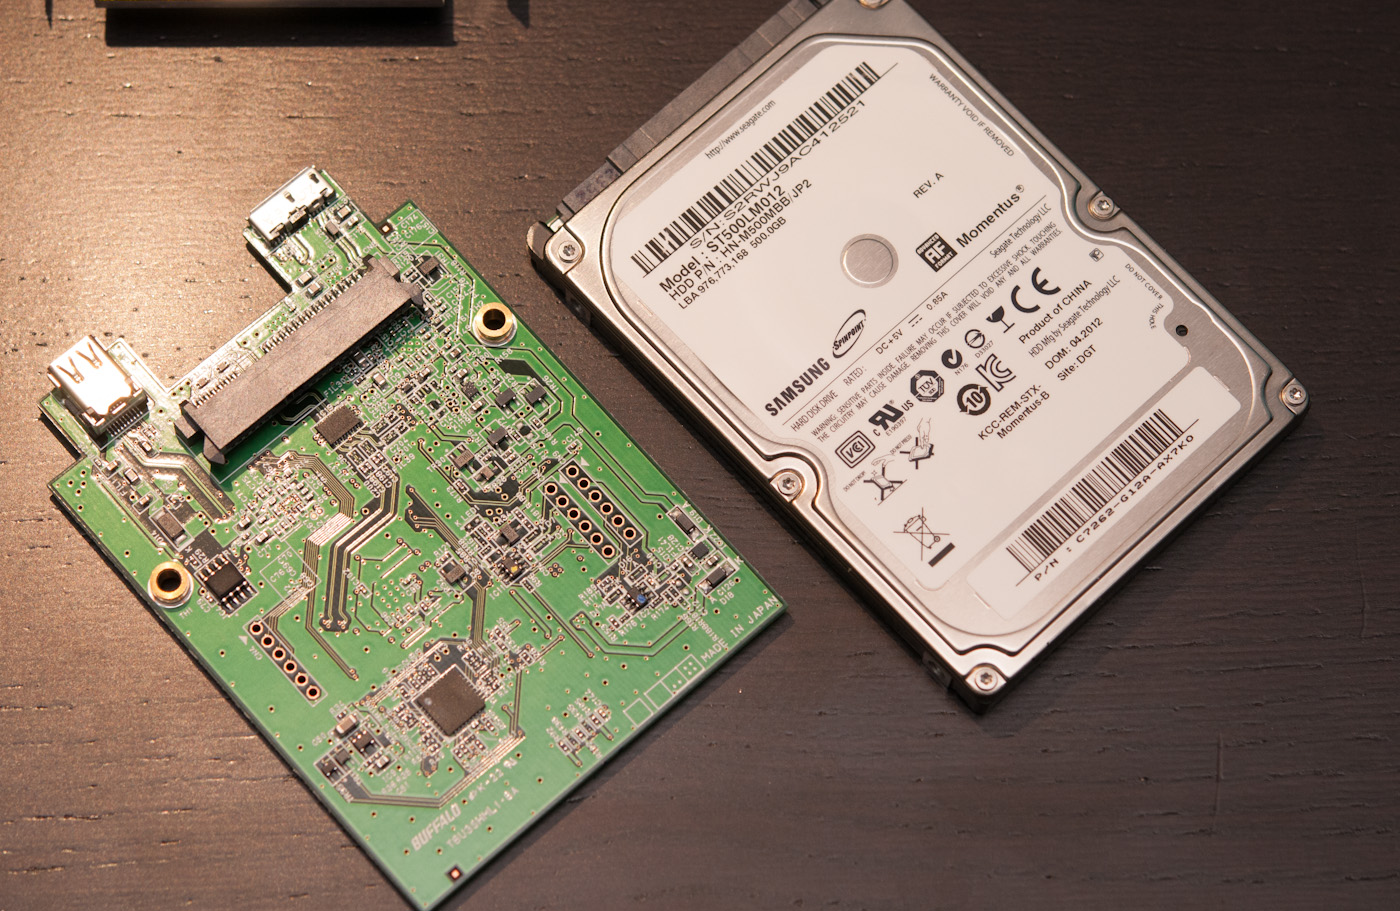
With this apart, you can separate the PCB which runs under the 2.5" HDD inside the drive. In the case of my 500 GB model, the drive is a SATA 3.0, 5400 RPM, 8 MB cache, Samsung ST500LM012. I’m not sure what the 1 TB model uses since I wasn’t sampled one, but likely the same family.
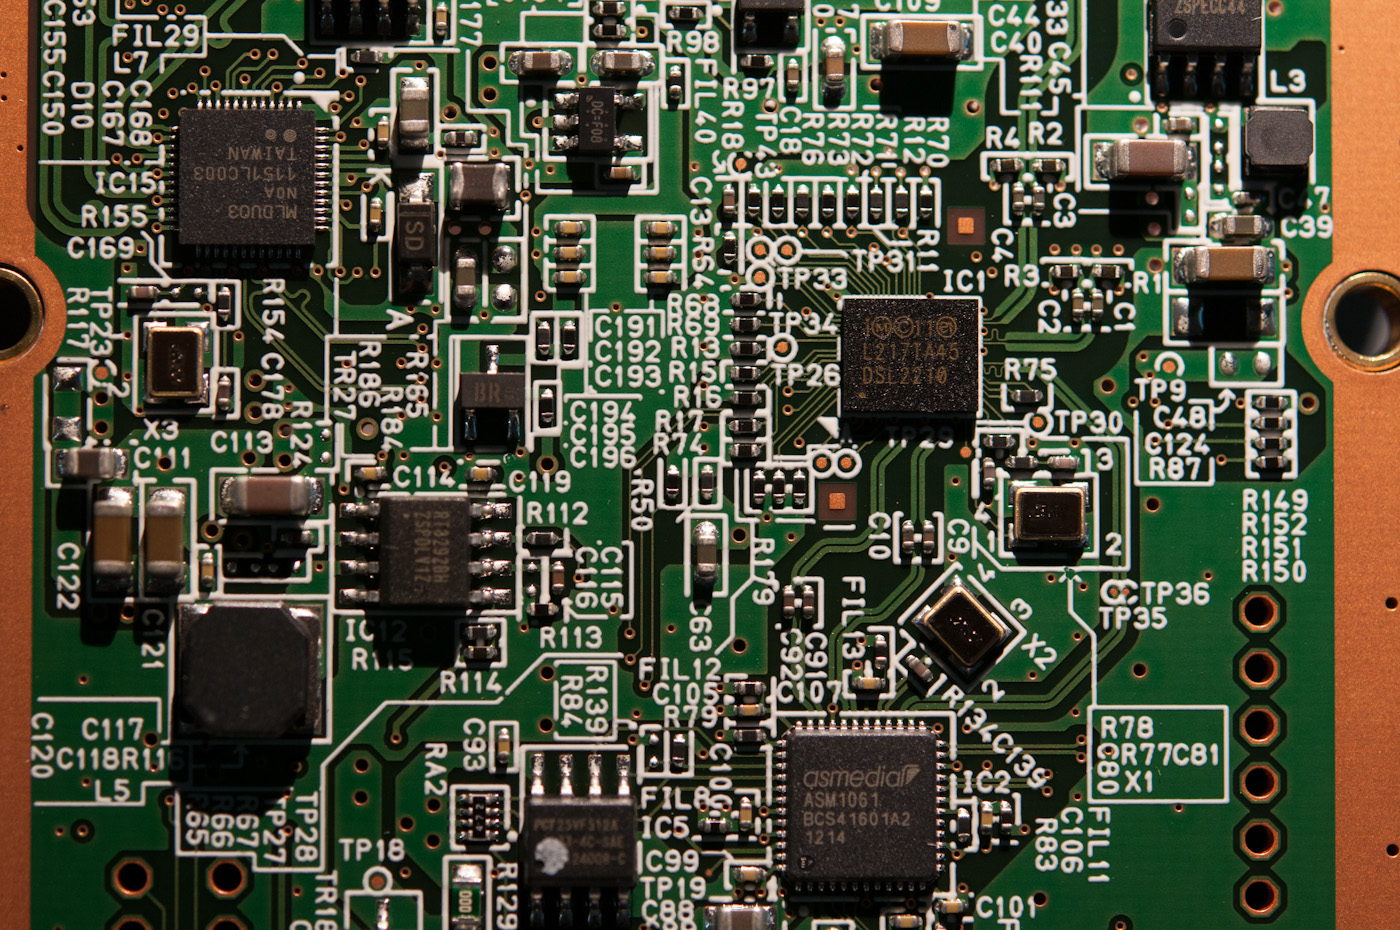
The board runs almost the full length of the HDD underside, and there’s a fair number of packages onboard. On the topside we can find the Intel DSL2210 (codename: Port Ridge) endpoint Thunderbolt controller, which is a single Thunderbolt channel, 2 PCIe device with 0.7W TDP. Port Ridge is popping up in a lot of places, for good reason - it’s inexpensive, second generation, small, and has a low TDP. What it sacrifices is pass through functionality or additional Thunderbolt channels.
At center, below the DSL2210 is an ASmedia AS1061 PCIe-1x to SATA 3.0 controller. This is clearly the controller used when the MiniStation is connected over Thunderbolt. Again, Thunderbolt basically tunnels either PCIe or DisplayPort, you need a fully fledged PCIe controller on the other side for whatever you’re connecting to.
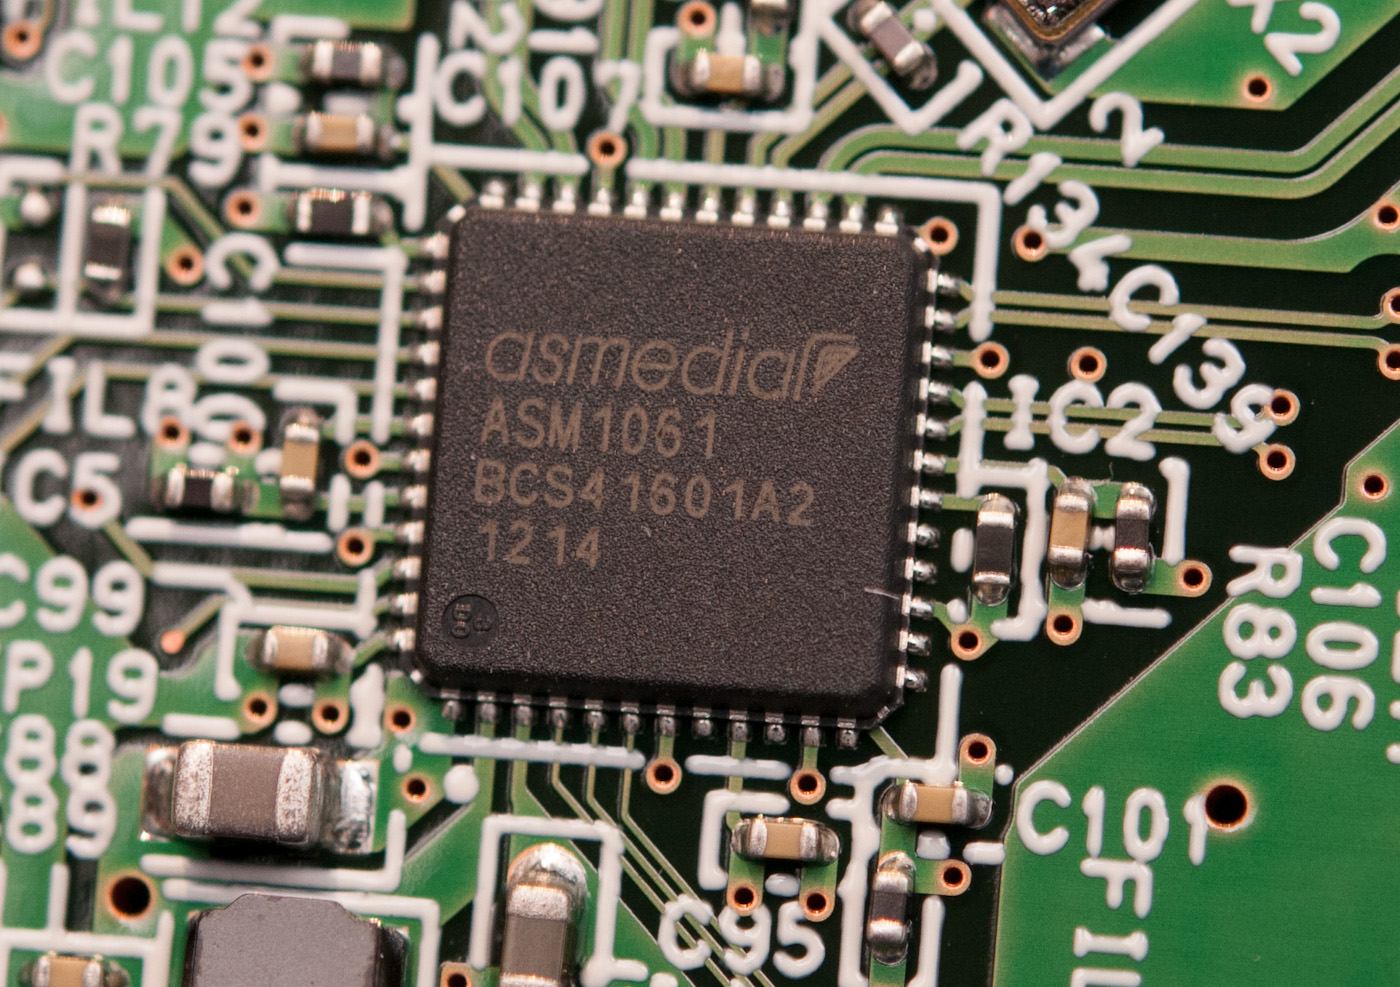
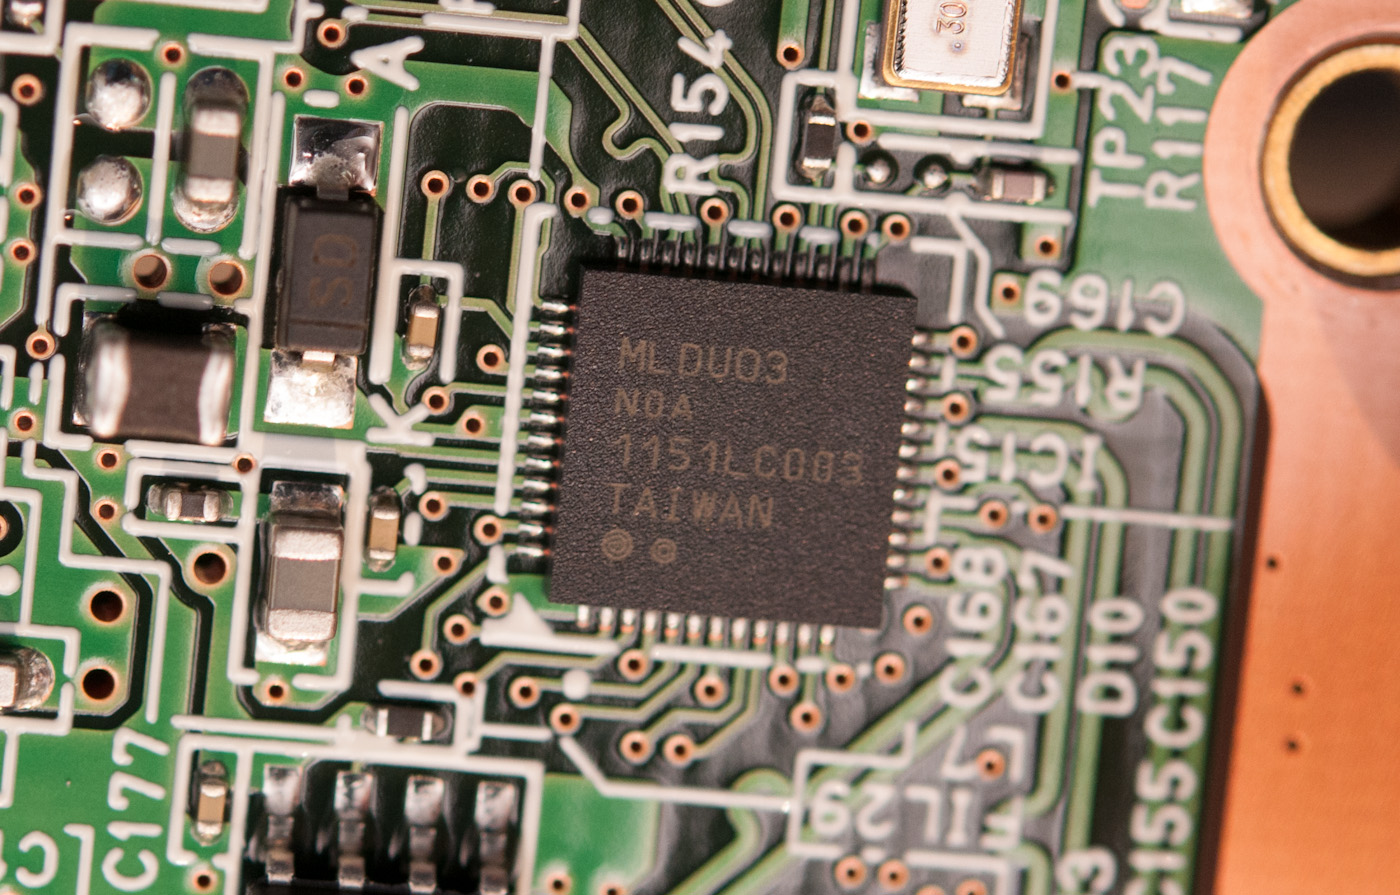
At top left under the USB 3.0 controller is a MediaLogic MDLU03 USB 3.0 to SATA 3.0 controller, which obviously gets used when the drive is connected over USB. On this side of the board there are a few other things, like a step-down converter for Thunderbolt power, a tiny 512 Kbit flash, and three white LEDs (with pads for two more) at the bottom.
So you’re probably wondering, well, how does the device switch between the MediaLogic USB 3.0 controller and the ASmedia controller? The answer is on the other side of the PCB.

Here on the back side of the PCB there’s both an ASmedia ASM1456 SATA 3.0, 2 to 1 multiplexer/switch, and an NXP LPC1114F (PDF) microcontroller with an up to 50 MHz ARM Cortex M0 at its core. This controller undoubtably contains the management and logic which tells the switch which SATA controller to choose between. There’s also something a little bit ironic about Intel having to recommend use of an ARM Cortex M0 controller for its platform for Apple and Buffalo - it seems like making a next generation Thunderbolt controller with a tiny controller or AP of its own onboard would make a lot of sense.


There’s a ton of integration here to do what seems like a simple task, but the end result is a drive which will connect and switch between USB 3.0 and Thunderbolt and handle the edge case where someone decides to connect both at the same time. The only real next level is for future Thunerbolt controllers to offer some onboard AP purely for devices like this with multiple I/O. Maybe we’ll get a third generation Thunderbolt SKU with SATA built in, that would seem logical.
After I ran performance numbers and testing on the MiniStation with HDD inside, I disassembled the MiniStation and tossed in an OCZ Vertex 3 MAX IOPS, which works perfectly. Getting the MiniStation back together is a bit of a challenge, but not impossible - I just don’t want to do it again, and with those plastic clips and adhesive would only recommend disassembly and reassembly once. That’s the tradeoff which gets made for having a drive with no external screws.


61 Comments
View All Comments
Kurobuta - Friday, March 8, 2013 - link
I have MBP 13 retina and it only has 2 USB ports.I use a Logitech Anywhere mouse with one of those USB Unifying receiver always plugged into one port.
That leaves me only a single USB port for other stuff. When i backup this external drive to another external drive, then i need to unplug the Unifying receiver.. Not the end of the world, i would like to be able to carry on without that extra step.
I would like to be able to use my currently always empty TB ports for something... moving my external USB disk over to TB is idea.. Even if the TB Ministation isn't running at full TB speeds, that is okay because it is still way faster than USB 2.0.
On point is that i think it would've been ideal if this Ministation was designed to be easily opened.. It would definitely make it more appealing for the power user that might want to swap out for a larger capacity or SSD..
For those just wanting the ministation just for the interface, one could easily sell the hard disk on ebay for a few bucks.. or simply put it into a USB 3.0 enclosure and use it for backups.. one could never have too many usb disks!