Hardware Tricks: Can You Fix a Failing Mobile GPU with a Hair Dryer?
by Jarred Walton on March 19, 2013 1:45 AM EST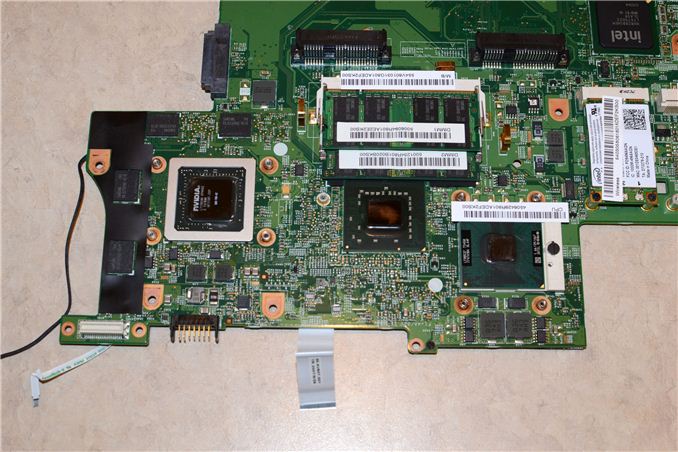
Over the years, I’ve encountered my fair share of hardware failures while writing for AnandTech. For example, nearly every SFF I reviewed back in my early days failed within a couple years (usually a dead motherboard); Both of the first AM2 motherboards I reviewed also died within six months. I’ve seen more than a few bad sticks of memory, particularly overclocking RAM that couldn’t handle long-term use at higher voltages. And let’s not even talk about hard drives—lately I’ve noticed an uptick in the number of people coming to me with laptops that have a dead hard drive; so far I’ve only managed to successfully recover data from one drive using the famous (infamous?) “put your hard drive in the freezer” trick.
Needless to say, when a friend came to me with an old Gateway P-6831 FX from early 2008—a laptop I awarded a Gold Editors’ Choice award to, no less!—and it was giving him a “Code 43” error on the GeForce 8800M GTS graphics, I didn’t have much hope of fixing the problem. Still, five years out of a $1300 gaming notebook isn’t too bad, and when I saw some suggestions online that I might be able to fix the GPU by putting it under the heat of a hair dryer for a couple minutes, I figured, “What do we have to lose?” Well, what we had to lose was about four hours of my time, as this particular notebook is something of a pain to disassemble down to the GPU. But in the interest of testing out the “hair dryer” trick, I though it worth a shot. Here’s the video footage of the process.
Much to my surprise, all of the effort proved worthwhile, at least in the short term. Most fixes of this nature will only prolong the lifetime of failing hardware, but if you can get another several months—or dare we hope for a year?—out of a laptop with such a simple solution, that’s pretty good. I did take a moment to at least do a quick check of graphics performance. Five years ago, the 8800M GTS was one of the fastest mobile GPUs on the block—surpassed only by the more expensive 8800M GT and 8800M GTX. 64 DX10 CUDA cores running at 500MHz might not seem like much, but the 256-bit memory interface (clocked at 1600MHz) is nothing to scoff at.
And what sort of performance does the 8800M GTS deliver? Even when paired with a now-decrepit Core 2 Duo T5450 (1.66GHZ), the notebook still managed a reasonable score of just under 7000 in 3DMark06. To put that in perspective, however, Intel’s HD 4000 with a standard voltage mobile CPU now manages around 7500. Of course, 3DMark06 optimizations are pretty common, but we’re basically looking at top-end mobile GPU performance from five years back now being found in Intel’s IGP. When Haswell launches in a few months with GT3 and GT3e mobile parts, we’ll likely see IGP performance start to encroach on decent midrange GPUs like the GT 640M and HD 7730M—at least, that’s what I’m hoping to get!
Anyway, if you’ve got a failing GPU or other component and you’re at the point where you’re ready to throw it in the trash, if you’ve got a bit of time you might give this hair dryer trick a shot. I’ve seen others recommend baking a GPU PCB in the oven at 200C for eight minutes, and while that could work as well it seems more likely to burn out some other component if you’re not careful. Sadly, this trick (and the freezer trick) both failed on another recent HDD failure; next up on my list of hardware tricks to try: transplanting a dead HDD’s platters into a working drive. Wish me luck; my dad’s data needs it!


30 Comments
View All Comments
PCMerlin - Tuesday, March 19, 2013 - link
I have a very similar model to this laptop, the P-7811 FX with the 1900x1200 screen, which is one reason why I still use this over any "new" offerings with lower resolution displays.I went one step further to help in making this a more permanent fix, rather than just the temporary fix that most here are mentioning. If you take a very small copper shim and insert it on top of the video chip, with a layer of thermal compound (I used arctic silver at the time) on BOTH sides of the shim to ensure 1) a better thermal connection to the heatsink and 2) a little extra pressure on the chip itself to keep it in place. I also removed and replaced the thermal compound on the CPU, and added thermal compoud to the Intel chipset (that gets hot, too!) and replacing the thermal pad that goes on top with another copper shim similar to what was used on the graphics chip, but thicker to make up for the loss of the pad.
Another thing not mentioned here is the absolute need to do a throrough cleaning while you have the laptop open. Get any dust built up blown out of the way, and especially the fans - you might not be able to see it, but quite a bit of dust can build up in the vents behind the fans.
After doing this, I have noticed that the laptop runs much cooler than I can recall it ever running before, which I hope will at least keep it going until more laptops come out with retina-level display resolutions.
JarredWalton - Tuesday, March 19, 2013 - link
Oh, the dust bunnies living inside this thing were legendary! I cleaned it out with a blower first, which made a huge puff of dust, but that was outside. Even after doing that, however, when I got to the actual heatsinks on the CPU and GPU I found there were still large chunks of dust bunny to remove ("dust bunny giblets"!) So hopefully the combination of removed dust buildup, new thermal grease, and hair dryer reflow soldering will do the trick for at least a few months, preferably a year or more. :-)Iketh - Tuesday, March 19, 2013 - link
Please do an article on your platter transplants, successful or not!wicko - Tuesday, March 19, 2013 - link
This is how I revived my launch PS3 temporarily - long enough for me to back up all my data.rivethead23 - Wednesday, March 20, 2013 - link
I still have this exact same notebook. Was a great machine and will still play some worthwhile titles. About 2 years ago I turned it on and nothing.. No lights no fan spin nothing. Figured it was cooked and began shopping for a replacement. Decided to call Gateway to see about buying a replacement motherboard (as the power supply was outputting the correct voltage). They offered a flat rate repair of $199. All said and done they replaced everything but the screen keyboard and housing. Still running today. I suspect this GPU issue was likely at fault.. If it dies again I might have to try it.plcn - Wednesday, March 27, 2013 - link
funny, i've seen a ps3 YLOD "fixed" the same way...compcons - Wednesday, March 27, 2013 - link
I had an HP pavilion dv4 die due to failed GPU. I checked around and found SRR manufacturing (http://srrmfg.com/). They basically disassemble the laptop, remove the GPU, reball/resolder, check with some xray equipment, and put it all back together. Price? About $110. The huge upside is the guy is 15 minutes from my front door. Well worth the cash, low risk, and very effective. I spoke with Dale for a while about the hairdyer and oven tricks. He showed me the results of the DIY "fixes". Sorry to sound like a commercial, but I was thrilled with the result. Something to consider if you want to really save a PC.EH
theohtechguru - Friday, March 29, 2013 - link
I've used the oven trick (12min @ 445F ) with lead free no clean flux on multiple devices. Video cards, Laptops (Always the northbridge) , Xbox 360's and PS3's. Every time was a success, I've always took great care in insulating the cap's and plastic components though.7Enigma - Monday, April 1, 2013 - link
I've fixed about $3000 of equipment resoldering bad joints on everything from a neighbor's car (clock and heater panel), to my sister's LCD TV, my car (body control module), and other electronics. So many failures in the last 10 years due to (my hunch) lead free solder (more rigid and likely to crack under temp swings) and cold-soldering (faster heating/cooling). Most of these defects can be easily seen with good lighting and a magnifying glass. Then it's as simple as reheating a bad joint with a good amount of flux and letting it cool back down.123hpprintersetups - Monday, December 31, 2018 - link
If you are unable to setup HP envy printer? Get Looking for setup <a href="https://123-hp-printer-setups.com/envy-printer/set... rel="dofollow">HP Envy 5535 printer</a>? Get instant st instant assistance to setup your printer at <a href="https://123-hp-printer-setups.com/envy-printer/set... rel="dofollow">HP Envy 5535 Wireless Printer setup</a>