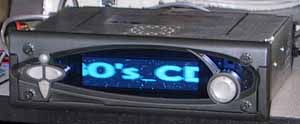
Original Link: https://www.anandtech.com/show/622
MP3 meets Car Audio: Empeg Mark II in-dash Car MP3 Player
by Anand Lal Shimpi on September 18, 2000 3:17 AM EST- Posted in
- Smartphones
- Mobile
It wasn’t too long ago that AnandTech dove into some MP3 coverage with reviews of Portable MP3 players from Best Data and Pine Technology. Since then, the popularity of not only the MP3 standard but also the players that make the standard useful has increased tremendously. Not only are companies like Diamond producing MP3 players but the kings of portable electronics of yesterday are jumping on the bandwagon as well. With Sony already promoting their line of digital music players and RCA having produced a Rio clone not too long ago, it’s obvious that MP3 was most definitely moving mainstream.
But why should MP3s only be used as a replacement for the portable cassette or CD player? It wasn’t long ago that a handful of creative thinkers imagined what it would be like to have a MP3 player in your car. Unfortunately, while MP3 players gained incredible popularity, facilitated by downloading services such as Napster and Scour, the players never really made their way into the next most logical place, the car.
Car audio is an incredibly large market, mainly because unlike portable electronics, in the car you are given much more room and the ability to produce some fairly high quality and high volume audio. In spite of all of this room, the limitation of how much audio you can fit on a single CD still exists. In the home, you can always pickup a 200 or 300 disc CD changer granting you quite a bit of music, and you can always run over to your CD collection to pick out another title if you’ve completely exhausted your current playlist. Then there’s always the computer, the foundation of your MP3 collection, which can provide endless amounts of music basically limited by the amount of space remaining on your hard drive and the speed of your connection to the Internet.
Neither of those two options, a 200 disc CD changer, or having your desktop computer in your car is feasible for day to day operation. While many have tackled the idea of keeping a laptop in your car simply for the purpose of playing MP3s, it is far from the most elegant and the most effective approach to accomplishing the task.
A man by the name of Hugo Fiennes ran into the same problem when attempting to upgrade the stereo in his Mazda Miata around two years ago. Faced with the constraints of 74 minute CDs and CDRs, Hugo quickly realized that even with a 10 disc changer, there’s no way to have your entire music collection at your fingertips in a car. As it has often been said, necessity is the mother of invention, Hugo put that very axiom to test as he set out to create his own in-car MP3 player in 1998, he called it the MP3 Mobile.
The point of the MP3 Mobile wasn’t to create a player that would play endless amounts of music, since very few people are in their cars for that long of a time period, instead, the point of the MP3 Mobile was to have available to the driver every last song in his/her collection at their fingertips. We’ve all been in the situation where the music that’s either on the radio, on your tapes or on your CDs that you have in the car just doesn’t fit your current mood, the MP3 Mobile was a way of getting around that.
The MP3 Mobile was a pretty powerful unit for its time, featuring 2.1GB of storage on a Hitachi 2.5” Notebook drive and a Pentium 166MMX processor. The unit was built upon an Advantec PCM-5682E motherboard (below) which was the perfect choice for such a project. Measuring just 8” x 5.75” (20.3cm x 14.6cm), the 5682 board featured the SiS 5571 chipset.
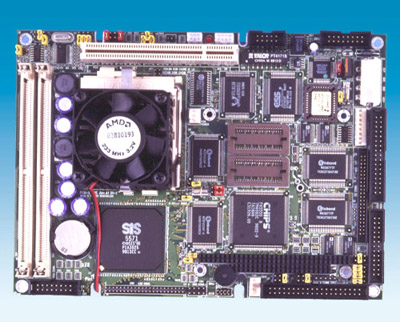
If you remember, the 5571 chipset was the heart of the MTech R534F Mustang motherboard which was at one time, the most attractive motherboard to run a Cyrix 6x86 processor on.
MTech's Mustang
based on the 5571 Chipset
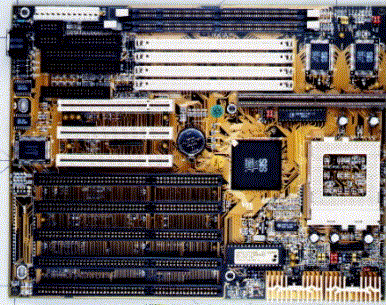
The beauty of the 5571 chipset was that it was a highly integrated, single-chip solution, meaning that Advantec could conserve quite a bit of PCB space by using the 5571. The board featured 2 72-pin SIMM slots, with no reason for SDRAM, the 2 72-pin SIMM slots made perfect sense for applications such as the MP3 Mobile.
The on-board parallel port was used to drive a 16-character Vacuum Fluorescent Display (VFD) that basically displayed the artist and song title read from the ID3 tag of the MP3 being played.
The 5682E board also featured an integrated ESS-1868 16-bit audio processor that drove the two outputs on the MP3 Mobile.
Naturally the MP3 Mobile was nothing more than a home project, its looks were far from commercial and mass producing such a crude design wouldn’t be too realistic. But it did get the job done, it generated enough attention to convince Hugo that a commercial version was definitely needed. And in August of 1999, the first product of Hugo’s company, empeg, was released and dubbed the empeg car Mark I.
The MK1 Rises and Falls
The empeg car Mk.1 improved upon Hugo’s original MP3 Mobile design and took the first steps towards producing a truly commercially viable car MP3 player.
The first thing the empeg car Mk.1 boasted over the original MP3 Mobile was that it made use of a much more specialized CPU. Instead of simply adapting a desktop CPU for use in a mobile application, Hugo and his team of 3 other engineers, made use of the Intel StrongARM processor. They used the S-1100-DA in particular which is a very general member of the StrongARM family. Operating at 220MHz, the low power processor features a 24KB L1 cache (16KB data + 8KB instruction set) and was the heart of the Mk.1.
The Mk.1 featured a total of 8MB of 60ns FPM RAM which if you’ll recall was what was found in most desktop computers prior to the assimilation of EDO DRAM seemingly ages ago.
The display on the Mk.1 was also much more advanced than the original 16-character VFD that was on the MP3 Mobile. The Mk.1 again featured a Vacuum Fluorescent Display with a 128 x 32 resolution and the ability to display 2-bits of color per pixel, obviously making it a grayscale display.
Obviously in order to make the Mk.1 “fit in” as a car audio product it would have to be able to resemble the rest of a car’s controls and displays, thus the Mk.1 featured swappable faceplates each with a different color tint. The Mk.1 featured a total of three different color faceplates, blue, green and amber, each with an anti-reflective coat that helped to improve visibility in sunlight.
The front panels of the Mk.1, although making it a bit more of an aesthetically pleasing unit, did not hide the fact that the unit was still far from a polished design produced by a Sony, Pioneer or any other major manufacturer.
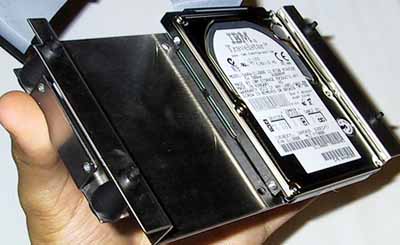
For storage, the Mk.1 made use of a drive tray that could accept up to two 2.5” Notebook Hard Drives. The reason for using a 2.5” drive instead of a cheaper, larger and more readily available 3.5” unit is because the 2.5” drives are naturally more geared towards mobile applications than their 3.5” desktop counterparts. Remember that your car is a constantly moving and vibrating environment, such a great amount of stress on your average 3.5” desktop drive would not be well appreciated. Going over speed bumps or potholes shouldn’t result in any sort of skipping in your MP3 playback and shouldn’t decrease the lifespan of your player, the Mk.1’s drive cage and 2.5” drives made sure neither of these two problems plagued it.
The smallest drive you could find on a Mk.1 player was a 4GB version, which was the entry level empeg player. Using a rough conversion of 1MB of audio per minute (128Kbps quality), the 4GB player could store up to 70 hours of music. For the true MP3 fiends, the Mk.1 was offered with up to 20GB of storage, and of course you could always add your own drives later on however doing so would void your warranty.
The Mk.1 would slide in/out of its cage that would be installed in any DIN-E sized bay in your car. The ability to physically remove the unit without much effort from your car was the easiest way to make sure that the Mk.1 could download the latest music from your home computer.
The Mk.1 unit itself featured both a 9-pin serial port and a 12Mbit USB port, which could be used to upload music onto the unit’s drive(s). Unfortunately this left very few uploading options for those that weren’t running Windows 9x, and transferring gigabytes over a 115/230Kbps serial port isn’t the most efficient method of transferring data.
The fact that the unit was running Linux attracted quite a bit of attention from the Linux community, however with no USB support at the time, empeg was essentially alienating the users of the OS they implemented into the Mk.1’s design.
Another issue that plagued the Mk.1 was the fact that it used floating grounds, something that is very uncommon in car audio. These floating grounds help to eliminate a lot of noise generated by the unit by grounding the audio separately from the digital/chassis grounds, but as we mentioned before, they’re very rare in car audio equipment mainly because they tend to intensify any ground loops that already existed. The use of floating grounds was just another quirk about the unit that kept it from being a truly commercial car stereo product.
While the theory behind the product was definitely a sound one (no pun intended), the Mk.1 failed to become a widely used product for a variety of reasons. Apparently the production yield on the units was quite low, making the Mk.1 very expensive to produce. This combined with the starting price of approximately $1,100 USD for the 4GB model, and the fact that buyers had to wait an incredibly long time in order to purchase their players made the fact that Empeg, Ltd. only shipped 350 units seem very realistic.
Necessity Rears its Head once again
 Just
like the mother of invention caused the production of the MP3 Mobile in 1998,
the need for a more commercially viable version of the original empeg car player
brought about the advent of the successor to the Mk.1, the empeg car Mark II
(Mk.2).
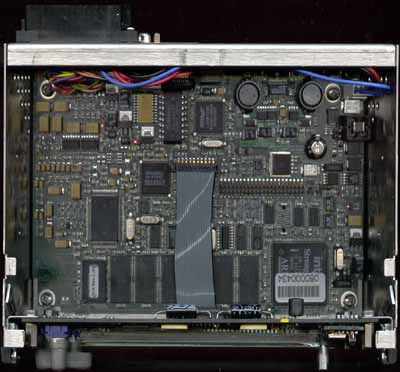
According to empeg, the biggest driving force for the production of the Mk.2 was the need for a design with nearly 100% surface mounted components and the need for an automated testing rig, more specifically a bed of nails test rig which is much like what the motherboard manufacturers in Taiwan use in their motherboard production lines.
The heart of the Mk.2 remained the 220MHz Intel StrongARM S-1100-DA processor, however the PCB design was much improved. According to Empeg, the 220MHz StrongARM processor is only at approximately 30% CPU utilization while playing an MP3, leaving quite a bit of headroom for more complex applications.
The Mk.2 received a memory upgrade to 12MB of 60ns FPM DRAM, however other than that, the foundation of the Mk.2 was very similar to its predecessor.
The Mk.2 still runs Linux, however in order to actually support the Linux community as well as those that weren’t blessed with USB support, the Mk.2 adds a 10Mbit Ethernet input on the actual head unit itself for uploading songs. According to Empeg, a hardware limitation prevented the use of 100Mbit Ethernet. Serial and USB interfaces (the latter exists only under Windows 9x/2000) are still supported.
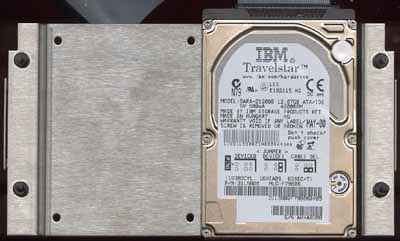
Internally, the Mk.2 can still hold up to two 2.5” Notebook drives at up to 17mm in height. As we mentioned before, 2.5” drives are naturally more shock resistant than their 3.5” desktop counterparts, but in order to aid this and prevent any skipping during play the drives are also mounted on a shock resistant platform.
The drives also spend quite a bit of their time spun down due to a very efficient caching system that we’ll talk about later. Since the empeg is a hard drive based unit running Linux, the question of boot time is an obvious one. Thankfully, the combination of the 4200 RPM, a minimal Linux configuration, and a system board designed for quick boot times, the empeg is ready to go in about 5 seconds after turning it on.
The available configurations for the Mk.2 are as follows:
|
Model |
Capacity*
|
Disk Configuration
|
Price
|
|
6GB |
100
hours
|
6GB
+ spare
|
$1199 |
|
12GB |
200
hours
|
12GB
+ spare
|
$1299 |
|
18GB |
300
hours
|
18GB
+ spare
|
$1549 |
|
36GB |
600
hours
|
18GB
+ 18GB
|
$1949 |
*Assuming 1MB/min at 128Kbps
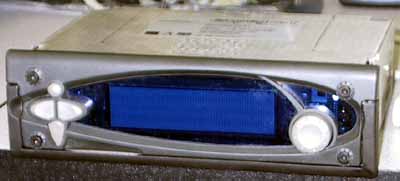
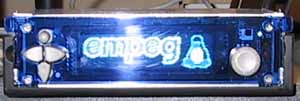
The same 128 x 32 x 2-bit color VFD display made its way onto the Mk.2, as well as the ability to swap out faceplates, however the looks of the Mk.2 were much improved over the original Mark I player.
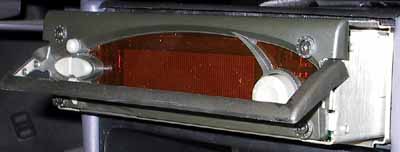
Instead of simply sticking a piece of colored plastic over the VFD display, the Mk.2 actually had a plastic faceplate that gave the unit a much more appealing look. The simple appearance of the Mk.2 can be considered by some to be superior to the extremely flashy and tasteless designs that we’ve seen lately in aftermarket head units. Then again, others may prefer that style to the empeg’s relatively simple layout.
Unfortunately, one advantage the Mk.1 continues to hold over the newer Mk.2 is that the colored faceplates on the Mk.1 featured an anti-reflective coating, whereas the Mk.2’s faceplates do not. This unfortunately means that in direct sunlight, the Mk.2’s display is extremely hard to read. The default blue face is the easiest to see in direct sunlight, however there’s a clear need for an anti-reflective coating on the panel. There are plans to introduce AR coated faceplates for the Mk.2 however we have yet to see any set date on when these will ship.
Another problem we noticed with the faceplates was that they scratch very easily, at least in comparison to most aftermarket head unit displays.
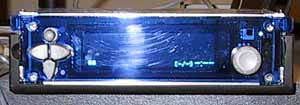
The Mk.2 also adds support for another display color, in addition to the blue, green and amber faceplates, empeg offers the Mk.2 with a red plate as well. As with the Mk.1, these face plates are interchangeable and user replaceable under warranty. While choosing an amber or red faceplate may end up matching the gauges and displays in your car, you sacrifice an incredible amount of functionality for that pleasure. The amber/red displays are very difficult to see in the sun, noticeably more so than the default blue as we mentioned above.
Amber

Blue
The floating ground inputs were ditched on the Mk.2 courtesy of the use of more standard line-level outputs, however those weren’t the only things to go. The original Mark I player featured an integrated FM tuner, making it a complete stand alone head unit replacement. The Mark II however, does not feature the integrated FM tuner that will be offered later as an external add-on module. For some, this is a major turn-off, however for those that aren’t planning on replacing their current head unit, this makes the Mk.2 a perfect companion since it can be used alongside your current head unit or as a replacement.
The control of the unit was also improved, providing a rotary control knob in addition to the standard 4 buttons. As an indicator of Empeg, Ltd’s U.K. base, the Mk.2’s rotary control knob is placed on the right hand side of the unit instead of on the left as with most head units designed for left hand drive cars.
The rotary control knob, by default, controls the volume of the Mk.2 which is useful if the Mk.2 will be replacing your head unit, or if you’re not going to be feeding the Mk.2 as an auxiliary input to your current head unit.
Another potentially useful feature is the inclusion of a microphone input on the Mk.2 which could be used for future voice recognition support.
Uploading Music
Chances are that before you even tackle installing the Mk.2 (from here on referred to as the empeg), you’ll want to transfer all of your MP3s to the device.
This is accomplished by using Empeg’s custom made software called emplode (or emptool under Linux). Mac users are unfortunately out of luck as there is no native Mac port of emplode, however Empeg has stated that emplode does work under Windows emulation software such as Virtual PC, RealPC and SoftWindows.
As we mentioned on the previous page, you can upload MP3s to the empeg using one of three methods:
1) Serial – 230Kbps max (28.75 KB/s)
2) USB – 12Mbps max (1.5 MB/s)
3) 10BaseT Ethernet – 10Mbps max (1.25 MB/s)
Now of course those three transfer rates are theoretical maximums based on the specification. In reality, unless you have a high-speed serial port, you’re looking at around 115Kbps from your serial port which is by far the slowest of the three options.
For those that don’t have an Ethernet card in their system or a network to plug into, USB is the next best option. However don’t be fooled by the 12Mbps figure, your transfer rate will be greatly effected by the number of USB devices in your system and that 12Mbps theoretical transfer rate can be an effective 4 – 6Mbps. The empeg’s USB is supported under Windows 9x and 2000 without any problems.
We did encounter an issue with attempting to plug the empeg’s USB cable into a powered hub, the unit would not reliably transfer data in that case, however plugging the cable directly into our test motherboard’s on-board USB port avoided that problem easily.
 The
Ethernet interface seems to be the best option for transferring MP3s onto the
empeg since it doesn’t require any sort of driver installs and is a fairly fast
method of transferring data.
Unfortunately in order to get the empeg to be recognized on the network by emplode we had to add a string that contained the IP of the empeg to the emplode installation key in the Windows registry. After doing that, the empeg was recognized perfectly by emplode.
The empeg should work fine with DHCP servers however for some reason it wouldn’t work with ours in the lab, thus we gave the unit an IP address (192.168.1.110) on the private LAN and made the appropriate changes in the registry as described above.
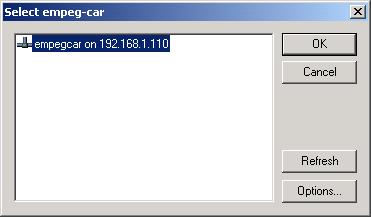
Our transfer rates over Ethernet were considerably higher than what we saw over USB, and the fact that no drivers needed to be installed made Ethernet our favorite of the transfer methods although it works just as well as the other two.
Emplode looks and feels like it has a Windows Explorer interface, however it functions in a very different manner. You can simply drag your MP3s, directories and all, into the emplode windopw and the software will take over from there. The empeg works on a database system, meaning that it doesn’t just place your MP3s in a bunch of folders, it actually has a database of all of your songs, their information and their location.
Each directory/folder that you drag into emplode becomes a playlist, with subdirectories being playlists within playlists. But dragging the files and folders into emplode doesn’t start the upload process immediately; instead the software allows you to organize your music and playlists the way you want to, then by clicking the synchronize button it proceeds to update the database and upload the files.
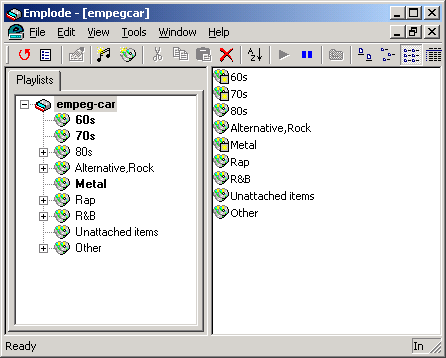
This system works quite well once you get used to it, however emplode isn’t without its faults. The most annoying problem we, as well as other emplode users have noticed is that dragging more than 500 – 700MB of songs at a time into emplode will often times crash the software. This is much worse under Windows 9x than it is under Windows 2000 due to simple differences in the robustness of the OS, but if you have a player that can hold between 6GB and 36GB of MP3s, you should be able to drag at least half that amount at once without having the software crash on you. Hopefully a future update of the software will address this issue, but it’s unacceptable to have in a shipping release of the software.
Another very annoying problem we noticed with emplode was that if you attempted to cut and paste a folder/playlist, the playlist would sometimes not paste properly in its new location and other times we’d see duplicates of the folder/playlist we just cut and pasted. If the guys at empeg could make emplode work a little more like Windows Explorer it would help quite a bit.
Don’t bother organizing your MP3s by filename, since filename is pretty much irrelevant under emplode. Instead, emplode organizes your MP3s within their folders according to ID3 tags. This is very useful as you will see later on, but it can be pretty annoying if you don’t have properly filled ID3 tags. emplode and the empeg can recognize ID3v1 and ID3v2 tags.
Based on the information in each MP3’s ID3 tag, emplode will by default sort according to song title, but it will also record the artist’s name, album name, year, as well as any additional notes.
Installation
The empeg’s install is much like that of its predecessor, you install a DIN-E sized cage into your car and the empeg slides in and out of that cage. As with any car stereo installation, if your car doesn’t follow the DIN-E specification properly, you’ll have problems installing the unit.
Empeg recommends that you leave the unit installed at an angle no greater than 16 degrees from the horizontal, doing so may defeat some of the shock resistant features of the empeg.
This leads us to the various configurations you could install the empeg in. As we just mentioned, the unit isn’t powered so you will need to have an amp regardless of how you install the player. But when you do install the player you have the following options:
1) Use the empeg as your only head unit. In this case all you would need to do is hook the unit directly up to your amp and you’ll be on your way.
2) Use the empeg as an auxiliary input to your current head unit. This method gives you the benefits of your current head unit, such as a built in CD player for those rare days when you don’t have the CD you want to play loaded on your empeg (if a friend brought one in the car for example), as well as any FM tuner features you may miss. However be certain that your current head unit can accept auxiliary RCA inputs, most aftermarket units require that you purchase an adapter cable that allows for you to use the empeg (or any device) as an auxiliary input to your head unit. Some factory OEM don’t even allow for such a cable to be purchased, so keep that in mind if you’re planning on exploring this option.
3) Use your current head unit as an auxiliary input to the empeg. This method gives you the benefits of the empeg without giving up the luxuries your current head unit might offer. This requires that your head unit has RCA line-level outs or that you buy a speaker level to line level adapter, this is assuming that you’re not using a system that uses unusual output levels (i.e. Bose systems). Be warned, if you don’t have the empeg unit installed in your car, your previous head unit won’t work since it’ll be going through the empeg.
If you’re going to be exploring option number 1 where you replace your current head unit with the empeg you’ll probably want to pick up a wiring harness for your particular head unit. This will basically allow you to plug the connector going into your current head unit into this harness and will prevent you from having to cut up your wires. A wiring harness will set you back an additional $10 - $15.
Another thing to consider is that many cars don’t follow the DIN-E specification required by the empeg. Because of this you may have to pick up a mounting kit if one is available for your car. If one isn’t available and your car doesn’t follow the DIN-E specification you may have to get creative with your install, there have been situations where a little dash trimming is necessary in order to get a perfect fit.
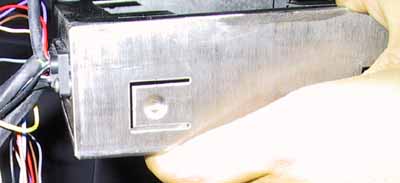
The empeg’s installation cage isn’t made all that well, there are a number of sharp edges and it is very easy to cut yourself on the metal. We have to give them credit though, it’s much easier to machine an entire block that will fit into a bay rather than a hollow metal cage in the case of the empeg.
The cage itself features quite a few cables hanging off of it that are supposed to interface with your head unit or your amp. The empeg unit has no built in amplifier, so you will have to have an amp in your car in order to use the empeg, anyone else see that price going up?
The back of the cage isn’t entirely open, meaning that if the rear of the cage is stuck on anything during its install you can’t tell by simply looking into the cage.
The cables hanging off of the cage include a total of 6 female RCA cables, the necessary power and ground wires as well as a 9-pin serial cable that can be used as an interface to other in-car electronics. Four of those RCA jacks are for the empeg’s 4-channel 4V line level RCA outputs, which have a 3.2V RMS rating making them above the 1 – 2V average for car stereos.

Any decent or high end car stereo will have 4V outputs, the reason behind this being that the higher the voltage of your output, the lower any noise will be relative to your output. For example, if you’re outputting 0.1V of noise on a 1.8V output, 6% of your output is noise. However if you’re outputting the same amount of noise on a 4V output only 3% of your output is noise. Because of this, the sound quality of the empeg should be identical to any CD player provided that your MP3s are of a high enough quality.

The last two RCA jacks are dedicated to a set of 1V line level inputs if you’re planning on using your current head unit as an auxiliary input to the empeg.
The biggest complaint we had about the installation of the empeg was that the cables were entirely too short. Unless the empeg is going to be a head unit replacement, the cables they provided are simply too short (around 6”) to work with, and for the price you’re paying for the unit you’d expect something a bit easier to work with.
Since the elimination of the floating grounds, the empeg car’s install is just as eventful as any other car stereo installation with no weird quirks courtesy of the empeg’s design.
Empeg Basics
Using the empeg’s basic features is pretty simple, the topmost of the four buttons pauses playback as well as opens up the menus and the bottommost of the four buttons selects menu items as well as resumes playback. The left and right buttons move forward and backwards through the current playlist.
Navigating through the playlists is as easy as bringing up the main menu and going to the playlists menu. Selecting the playlists menu will bring up a list of all of your top-level playlists, at this point you can set the empeg to play through all of the songs in your playlists sequentially or randomly. In order to enable random play, a visit to the menu is necessary and selecting the ‘Shuffle’ option will take care of the rest.
Selecting a playlist will bring up a new window with all of the playlists in that playlist or if none exist, the screen will start with the first couple of songs in that playlist, allowing you to cycle through them using the left and right buttons.
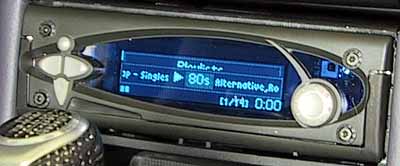
We found the best way to organize the MP3s on the empeg was to organize them into a handful of categories based on music genre (i.e. 60s, 70s, 80s, Alternative, Rap, R&B, Rock, etc…) and then place full albums in their own playlists within each of the initial genre playlists and singles directly beneath those initial genre playlists. Since it is rare that you want to hear a piece of classical music directly after some heavy metal, or some alternative right after some rap, this allowed us to randomize play within a specific genre or play a full album straight through without much time spent navigating thousands of songs.
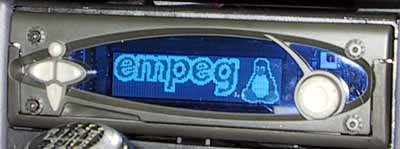
Skipping from one song to the next, even while randomizing gives no signs of the fact that you’re pulling all of this music off of a hard drive. There are no noticeable pauses between songs which is mainly because of the empeg’s very intelligent disk caching system. The drives in the empeg spent most of their time spun down because of this caching system, and because of its advanced shock resistant drive cage you’ll never notice any skipping.
After weeks of testing, we have yet to notice any pauses during playback or any skipping at all. This is during some fairly hard driving conditions as well, at AnandTech we’re not the most calm Sunday drivers.
Taming the empeg
Any old CD or MP3 player can randomize songs and ideally, all MP3 players would be able to handle at least single level playlists, but the empeg does much more than simply linear or random playback.
If you remember back to the section on emplode, the empeg stores all of your music in its internal database. The beauty of a database driven music system is that you can very quickly access songs, but even more important is that you can search through songs very easily if you have a good search algorithm, which the empeg most definitely has.
Remember how we stressed the importance of having correctly filled ID3 tags on your MP3s? Well, the reason behind this is that the empeg has the ability to search through your entire MP3 collection according to the various fields in your ID3 tags. You can search according to Song Title, Artist, Album, Year, or PIN, and as you can imagine, if your ID3 tags are filled out properly, you have a very powerful search at your fingertips, something you can’t do on your home computer without additional software.
Naturally you don’t want to go searching through your collection while driving, and you definitely don’t want to use a combination of four buttons and a rotary knob to enter in a search string, so how do you go about searching?
The empeg comes bundled with a Kenwood remote that has been adapted for use with the unit. By hitting the search button on the remote, you can shuffle through the various ‘Search By’ options that we mentioned above. The only complaint we had here was that there was no way to go back to Search by Artist if you went too far and ended up at Search by Year other than cycling through all of the options over again.

Inputting data is just like you would type in characters on a touch-tone phone. The empeg uses a fuzzy logic matching search algorithm which essentially operates on a process of elimination principle. For example, if you want to find all songs by the artist ‘Tool’ you’d first want to input the letter T which corresponds to the 8 key on the remote. However the 8 key also corresponds to the letters U and V, what the fuzzy logic matching search algorithm does is it eliminates all songs that don’t have an artist whose name starts with T, U or V. Hitting the number 6 next which corresponds to M, N and O will narrow down the results to only those songs whose artist begins with the letters T, U or V and the 2nd letter of their name is either M, N or O.
This process continues until you’ve narrowed down your search to one artist, title, etc… or at any time during the search you can simply navigate through the remaining matches using the << and >> buttons on the remote.
If you want to append the song(s) you’ve just searched for to your current playlist (which can remain playing while you’re searching) just hit the CD-MD-CH button on the remote and the song temporarily becomes a part of your current playlist, after you power down the empeg your playlist returns to normal.
Obviously you’d only want to do this at stop lights or while parked, since searching while driving could be very dangerous, not only to yourself but to others on the road.
The Equalizer
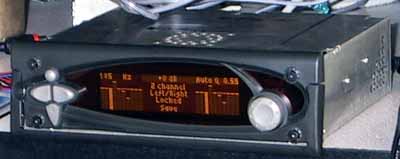
Some very strong evidence that those behind Empeg are pretty big audiophiles is the empeg’s 20-band parametric equalizer.
Most of you are probably familiar with the term “graphic equalizer” which is basically a feature that allows you to adjust the “loudness” of particular frequencies of the sound coming out of your stereo. For example, if you want more bass in the sounds you’re hearing you’d adjust the “loudness” or gain of the lower frequencies in a graphic equalizer. Or if you wanted to hear the higher notes louder you’d do the same but on higher frequencies listed in a graphic equalizer.
A parametric equalizer such as the one on the empeg, not only allows you to adjust the gain of particular frequencies, but also the bandwidth of those frequencies. This particular level of tuning is rarely used by your average audio enthusiast, however for those that are bigger audiophiles the empeg’s 20-band parametric equalizer is definitely appreciated.
Especially in an environment such as the cabin of a car, fine tuning of the gain and bandwidth of certain frequencies can be a good way of compensating for certain quirks of your car audio system and/or the way certain frequencies resonate off of the interior of your car.
Visuals
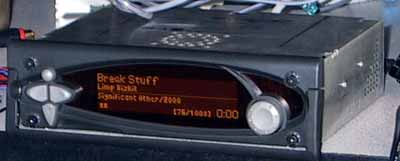
During playback, you have the option of displaying track information provided by the current MP3’s ID3 tag, the previous and next tracks, or information on the next four tracks.
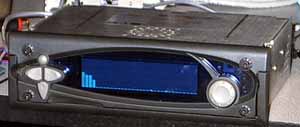
But if you’re more of a fan of having Winamp style visuals on your empeg, the unit has quite a few of them that you can cycle through.
The OS
 Using
Linux as the empeg’s OS provides for quite a bit of flexibility with the unit.
Since the empeg is software based, as more compression standards become widely
used a simple software upgrade can keep the empeg up to date. If the MP4 standard
becomes widely used, the empeg would require no more than an upgrade of its
software (which can be done using the serial interface) in order to support
the standard.
With the open source nature of Linux, there are a number of end user projects being conducted for the empeg, and hypothetically if one were not satisfied with the UI on the empeg itself they could modify the interface themselves.
As we mentioned before, even during MP3 playback the empeg’s 220MHz StrongARM processor is only at about 30% CPU utilization, so there is quite a bit of other tasks the empeg could tackle.
There have been hints dropped about using the microphone input of the unit in order to support some form of voice recognition which could definitely eat up some of those unused CPU cycles.
The point here is to illustrate that the possibilities are endless, the guys at Empeg are currently working on updates to the empeg software as are the very dedicated members of the empeg community that happen to be all interesting in improving the empeg as a product.
Final Words
The empeg car Mark II is undoubtedly the most powerful in-dash car MP3 player available on the market, but it definitely comes at a very high cost. With the entry level player at $1200, you’re going to have to go on a period of ‘hardware upgrade fasting’ if you break down and pick up an empeg.
This isn’t to say that the features aren’t worth it, because they most definitely are. The virtually unlimited storage, high quality output and very powerful search engine are all features that will probably go unrivaled by even the best mass market players for quite some time to come.
Our biggest complaints that existed with the empeg are the barriers that will prevent it from becoming a mainstream product, which it definitely could be in a slightly altered form. Let’s take a look at the major problems we had with the empeg first:
- The empeg’s faceplates scratch entirely too easily and in their current form lack any sort of anti-reflective coat. Empeg is aware of the latter, it’s just a matter of time before they address the issue.
- emplode as a software utility needs some serious improvement, the ability to handle larger uploads of music at once and a more Explorer-like interface are its two major downfalls.
- The construction of the DIN-E sized cage that is installed in your car could use some improvement. Compared to any brand-name aftermarket stereo, the empeg’s cage still offers reminders of its home-project heritage. The wires coming off of the cage itself could use some lengthening as well.
- The empeg’s remote, being a generic Kenwood remote, could use a different faceplate which could list the actual functions of the various buttons. Currently, you are supposed to know that the ‘*’ button on the remote opens/closes a menu. For first time users things like this can be a big turn off, if the empeg is going to eventually turn into a more commercial product this is something the company should take into consideration.
- While the looks of the Mark II are improved over the original empeg, there is still a bit of tweaking necessary before the unit will be able to stand up against the cheaper commercial alternatives.
There’s a very fine line between a truly commercially viable product and a dressed up home project, and the empeg is coming very close to crossing that line into the commercial world. Right now very few commercial manufacturers are catching onto the MP3 craze, however they are taking notice of the market that Hugo at Empeg discovered two years ago.
Empeg could very easily become a household name if the company plays their cards right. The Mark II needs a cost effective counterpart to address a segment of the market that is going to be dominated very soon by MP3-CD players. Get rid of some of the features and aim to produce a sub $600 unit while continuing to improve their high-end model, currently the Mark II.
They should take a page from the book of success of other companies in the computer industry, you implement all the features you want in a high-end model while providing a crippled low-end version for the mainstream market segments. Then, later on, as the technology improves, the features that were once reserved for the “high-end” model will easily and affordably be implemented into the more mainstream and value products.
For now, if you have the money, there’s nothing that currently does all that the empeg can do and nothing that even comes close to doing it as well.
Being a small company, Empeg can offer their users a very personal level of attention and service, which is definitely commendable. However they need to improve the amount of troubleshooting information present on their website. Most of the troubleshooting information is present in threads posted on the Unofficial Empeg BBS, however that wealth of information needs to be somehow compressed and placed on their main website as well. A user should never be required to visit a message board in order to get a useful troubleshooting FAQ. Also, for a product as powerful as the empeg, the User’s Manual could definitely use some more depth to it covering some of the aforementioned troubleshooting topics, especially regarding emplode.It will be very interesting to see how Empeg as a company grows over the next year, they definitely have the potential to bring this type of technology down to the mainstream market since it’s obvious that the larger manufacturers haven’t made the connection just yet.
It’s up to them if they’ll make “Empeg Inside” a slogan of the future.
How it Rates
|
AnandTech Rating |
|
|
Rating
(x/10)
|
|
|
Audio Quality/Performance
|
9.5
|
|
Features
|
9.5
|
|
Price
|
2.5
|
|
Availability
|
4.0 |
|
Documentation & Software Bundle
|
6.0
|
| Overall Rating - Not an Average |
8.0
|

