Original Link: https://www.anandtech.com/show/1458
Building a Linux PVR Part I - MythTV Setup and Install
by Kristopher Kubicki on September 3, 2004 12:05 AM EST- Posted in
- Linux
Introduction
Once in a while, we get so excited about writing an article that we completely lose focus and end up with a 10,000 word epic instead of a concise little review. This two-part Linux TiVo article ended up being one of those articles. Of course, we aren't really building a Linux TiVo, but rather something as close as we can come, with some rudimentary hardware and free software - such as Linux and MythTV.Considering the cost of a TiVo, service runs anywhere from $100 to $600 per year depending on what DVR and subscription you buy. Building a moderate MythTV machine for around $500 actually saves us money in the long run. Building our own device also allows us to upgrade hardware easily and reconfigure the software at our will.
Ultimately, we would like our machine comparable to a TiVo device; but in actuality, we really would like it to perform as well or better than a machine based on the same hardware running the newest Windows Media Center (Anand wrote a small MCE introduction 18 months ago). Recently, we obtained a new whitebox Media Center device with similar hardware found in this Part I of our Linux TiVo experiment. Our goal for Part I of the article is to get Linux, MythTV and all the trimmings working successfully so that we can square both machines off against each other; and then compare encoding, image quality and functionality. We are publishing Part I: The Installation today, but expect Part II: The Comparison in just a few days.
If all goes well, we will probably follow up with a Part III some weeks later, dissecting Freevo, GeexBox, etc.
Getting Started
The first thing that we need to do is get our hardware list ready. Obviously, all of our hardware has to work with Linux and Windows Media Center Edition (WinMCE), and we have to watch out for some "gotchas" with lirc (our remote control program) and MythTV. Although not the best distribution on which to install MythTV, we will use SuSE 9.1 for our base Linux install, since we are familiar with it and we use it for all of our other Linux benchmark testbeds. As a result, we first make sure any hardware that we use works with SuSE; listed in the hardwaredb. If a particular hardware that we pick out requires a bit more extensive installation, we can live with that as well, just so long as we can compile our own drivers.Determining what hardware is supported on Win MCE is a bit more difficult, although there are some resources to help. Fortunately for us, we do not have to determine specifically which hardware MCE runs, since it only ships pre-installed on devices such as our whitebox Media Center. We will try to keep the components of both machines as similar as possible.
Below, we calculate the cost of the whitebox and Linux device:
| Whitebox Windows MCE Device | Price | |
| CPU | Sempron 3100+ | - |
| MOBO | Undisclosed | - |
| Audio | Integrated (VIA) | - |
| Ethernet | Integrated (Realtek 10/100) | - |
| VGA | GeForce 4 MX440 128MB | - |
| Tuner | Hauppauge WinTV PVR-250MCE | - |
| HDD | Western Digital 80GB WD800JB | - |
| RAM | 512MB Micron DDR400 | - |
| Optical | Sony DDU-1613 | - |
| Remote | Undisclosed | - |
| Case | Undisclosed | - |
| OS | Windows XP Media Center Edition 2004 | - |
| Total | $699 | |
| AnandTech Linux Device | Price | |
| CPU | Sempron 3100+ | $125 |
| MOBO | DFI K8M800-MLVF | $81 |
| Audio | Integrated (VIA) | - |
| Ethernet | Integrated (Realtek 10/100) | - |
| VGA | GeForce 4 MX440 64MB | $40 |
| Tuner | Hauppauge WinTV PVR-250 | $130 |
| HDD | Western Digital 80GB WD800JB | $60 |
| RAM | 512MB Corsair DDR400 | $75 |
| Optical | BenQ 16X OPAL-OC1 | $24 |
| Remote | Included with PVR-250 | - |
| Case | Opus TT-501 | $100 |
| OS | SuSE Linux 9.1 | - |
| Total | $635 | |
As you can see, our Linux device is priced out cheaper and we even went fairly frivolous on a lot of items. Another SFF case favorite of ours, the SuperFlower SF-101, sells for $40 with power supply and looks just as good, if not better. We threw a Sempron 3100+ in our test rig for easier comparison between the MCE device and our own, but as you will see later in the analysis, there are some other benefits to using the additional computing power, such as background encoding to Xvid.
Going with a Tuner card for the Linux machine gives us many options. Originally, we had scheduled to run all of our tests with the Hauppage WinTV Go card, which does not have any hardware encoding at all - this card is actually better supported by SuSE as well. However, since we would later be comparing our test rig to a MCE unit that relies mainly on hardware encoding, we thought it best to keep the playing field level on both machines. The MCE unit uses a slightly better version of the PVR-250 card (it has onboard FM support), but for our purposes, the vanilla PVR-250 works just fine (and it comes with a remote).
If you intend to replicate our hardware setup for your own MythTV machine, choosing a WinTV Go card may save you additional cash, but you will definitely need as much crunching power as possible. Combining a software encoding with a slower processor is a recipe for disaster.
Putting all the hardware together only took about 15 minutes; our total time for installation is right now at 15 minutes.
Installing the OS and Drivers
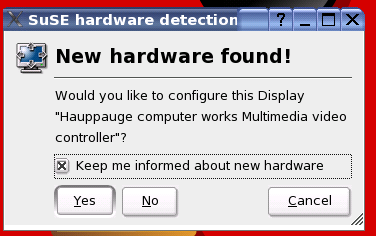
As a forewarning, this is not a replacement for the excellent MythTV documentation. We have only included our installation for completeness.SuSE 9.1 has a blindly simple installation, so we won't really go over that here. We used all default options while installing; everything went very smoothly. Although you may run YAST now for the online update, remember to re-run it again later if you install any RPMs. This is particularly true if you install the kernel-source RPM after you have already updated your kernel to a different version. For the remainder of our article, we will use the 2.6.5-7.104-default kernel.
Unfortunately - as we had somewhat expected - SuSE does not have very good support for Hauppauge hardware encoding PVRs. SuSE knows it's there; it just doesn't know what to do with it.
For us, the most painful part of the installation came when installing IvyTv, the open Linux drivers for iTVC15 found on the Hauppauge PVR-250. IvyTV (commonly called "ivtv") has a simple download page, and we opted for the 0.1.9 release found here. Since we will be compiling some kernel modules, we need to install the kernel-source package from YAST or via RPM. YAST solves all the dependency issues for us, so that is what we generally use.
Back in the ivtv driver directory, we go ahead and run make. If the Linux kernel source is installed correctly, within a few seconds, we should have working PVR kernel modules. We can attempt to load the card right now using the commands below:
# modprobe i2c-core
# modprobe i2c-algo-bit
# modprobe tuner type=2
# modprobe msp3400
# modprobe videodev
# modprobe saa7115
# modprobe ivtv
IvyTV (continued)
Supposedly, our tuner card is working correctly. We can quickly check to see if everything went OK by using the utilities included with the ivtv drivers and also by checking the /var/log/messages log. Our log reveals something like this:Sep 2 13:31:36 linux kernel: ivtv: Found an iTVC16 based chip
Sep 2 13:31:36 linux kernel: i2c-algo-bit.o: (0) scl=1, sda=1
Sep 2 13:31:36 linux kernel: i2c-algo-bit.o: (1) scl=1, sda=0
Sep 2 13:31:36 linux kernel: i2c-algo-bit.o: (2) scl=1, sda=1
Sep 2 13:31:36 linux kernel: i2c-algo-bit.o: (3) scl=0, sda=1
Sep 2 13:31:36 linux kernel: i2c-algo-bit.o: (4) scl=1, sda=1
Sep 2 13:31:36 linux kernel: i2c-algo-bit.o: ivtv i2c driver #0 passed test.
Sep 2 13:31:36 linux kernel: tuner: chip found at addr 0xc2 i2c-bus ivtv i2c driver #0
Sep 2 13:31:36 linux kernel: tuner: type set to 2 (Philips NTSC (FI1236,FM1236 and compatibles)) by insmod option
Sep 2 13:31:36 linux kernel: msp34xx: init: chip=MSP3448W-A2 +nicam +simple +radio
Sep 2 13:31:36 linux kernel: msp3410: daemon started
Sep 2 13:31:36 linux kernel: saa7114.c: starting probe for adapter ivtv i2c driver #0 (0x10005)
Sep 2 13:31:36 linux kernel: saa7114.c: detecting saa7114 client on address 0x42
dmesg also reports success:
# dmesg | tail
[<c013569b>] sys_init_module+0xeb/0x1e0
[<c0107dc9>] sysenter_past_esp+0x52/0x79
ivtv: No mem on buf alloc!
ivtv: Buffer alloc failed!
ivtv: Registered v4l2 device, minor 0
ivtv: Registered v4l2 device, minor 32
ivtv: Registered v4l2 device, minor 224
ivtv: Registered v4l2 device, minor 24
ivtv: loaded
Linux finally sees a v4l2 (video 4 linux) device. Note: YAST will not see the card. In order to run the utility packages from ivtv, particularly the tuner script, we needed to install perl and a few dependencies. All of these dependencies can be handled by YAST with the exception of:
perl-Video-ivtv-0.12-1.noarch.rpm (right click to download)
perl-Video-Frequencies-0.03-1.noarch.rpm (right click to download)
We pulled both of these RPMs off ATRPMs.net, but we have included them in the review in case you have difficulty locating them. The ptune-ui.pl utility allows us to change the channels easily for testing our PVR card.

Click to enlarge.
Using the quick and dirty method to capture video, we pulled a few seconds of broadcast to test how well our device was working.
# cat /dev/video0 > /tmp/test.mpg
If we play this test.mpg back with Kaffeine (or some other player), we will get an mpeg2 stream. So far, so good. We used MPlayer to pull a single frame out of the stream, which can be seen below:
# mplayer -frames 1 -vo jpeg outdir=/tmp:quality=100 test.mpg

Click to enlarge.
Keen observers will note that this image is non-interlaced - something that we will discuss later in our analysis.
Just getting SuSE install and ivtv to play nicely took two hours; our total time for installation right now is at 2.25 hours. Opting for a different distribution that supports the PVR card natively would have been a better idea, but we have already gone this far...
MythTV
We have gone through all the steps to get our hardware configured. From now on, we are basically software limited, assuring that we have properly configured and set up MythTV and its dependencies. Again, for those playing at home, please check the official MythTV documentation for setting up Myth.The largest issue that most people have with Myth are getting the dependencies correct. We used YAST, which in turn solved many of the dependencies for us. Just a quick refresher on which packages are needed:
qt3
qt3-devel
qt3-mysql
mysql
Some other items, such as XMLTV, Zap2It and lame, cannot be installed via YAST, and have some specific instructions of their own. Read the MythTV page very carefully.
Following the instructions on the Myth website got us up and compiling very quickly. Using the default compiling options, we had MythTV built and installed in a little under 20 minutes.
Now, we only need to run the setup configuration and install our plugins. The setup comes fairly easily once you become accustomed to using a keyboard or the remote control. There are two things that we must do before runnig ./setup. The first is to get mysql up and running, and then insert the Myth database. Myth's website documents this well.
The second thing to do concerns the Zap2it configuration. DataDirect (from Zap2it) downloads our channel listings and information, which is detailed on the MythTV page as well. Without DataDirect, we lose all of our Tivo-like functionality. Make sure to run the mythfilldatabase command before starting MythTV!
Finally, it is time to run ./setup. When we run the command, we are greeted with a simple screen with a few options. As we install plugins, this screen gets more complicated.

Click to enlarge.
The majority of options should be left relatively unchanged, but since Myth is so configurable, we will go over some of the more interesting configuration options before Part II. Once in the initial setup screen, the first option allows us to configure the Myth database server. Remember, the Myth front end has no objections to running on a separate machine that does not have a PVR card at all!

Click to enlarge.
MythTV (continued)
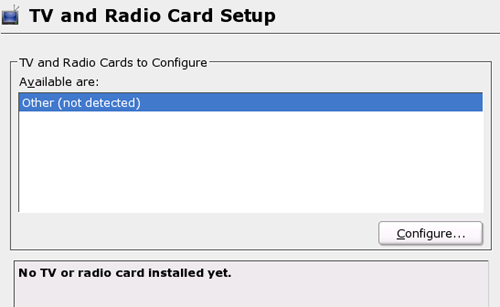
Moving onto the capture card menu, we can select our capture card and configure it for default options. Although SuSE/YAST does not recognize our Hauppauge PVR-250, MythTV sees the device as a Video for Linux device.
Click to enlarge.
Myth also allows us to use multiple tuners, something that we will go into more detail with in Part II. In the Input connection menu, we can modify our input sources from the PVR-250 card. By selecting the "Tuner 0" option, we can add the DataDirect channel stream and thus, all of our channels are automatically programmed in. The other inputs here allow us to do fun things with Myth, like capture our Gamecube output on one of the composite or S-Video connections as well.

Click to enlarge.
Going into the channel menu, we can see all of our channels from DataDirect programmed into the database. We are now ready to start playing with MythTV.
Starting MythTV is a two-part endeavor. First, we must run the backend, which can be done by just typing the command mythbackend.

Click to enlarge.
Then, starting the frontend can be done in a different shell by running the command mythfrontend. By doing so, the main Myth menu turns on, and we can reconfigure this to go straight to video instead.

Click to enlarge.
Testing the Water
There are many more configuration options inside these menus here. We can go straight to TV and just watch a live feed, or we can configure some of our options for video recording priority, etc. For now, we are just going to jump into the program guide.
Click to enlarge.
We see a very clean interface similar to SageTV or BeyondTV. We can actually go a bit further and check out programs by name rather than by channel and date.

Click to enlarge.
Recording is then done just by pressing record on one of the menu options, but it can also be initiated through manual recording the channel instead of recording the show.

Click to enlarge.
We don't want to spoil all of the fun for Part II, so we will just post a few teasers here in the meantime.

Modifying disk space allocation and deletion.
Click to enlarge.

Modifying your encoding codecs, allowing background transcoding!
Click to enlarge.

Letting Myth skip over commercials automatically.
Click to enlarge.
Total time to setup so far: 4 hours, 25 minutes.
Final Thoughts
And finally, after several hours of turmoil and despair, we have installed and tested our Linux device. Its far from perfect - we cannot readily work with digital TV broadcasts, for example. What we do have is a machine that will readily emulate all of the basic Windows MCE or TiVo functionality at a reduced cost - and we can hack/configure/manipulate it to any extent that we wish to in the future. On the downside, it did take us over four hours to set up and install everything.Another item to consider in our cumulative upcoming comparison is that you cannot easily (legally?) scrap together some hardware and install Windows MCE on it. We can do some neat things with programs like BeyondTV and SageTV, but we are not given the full experience of Windows MCE (and certainly not for free).
Other drawbacks of MCE devices include the inability to play back the video content on anything but other MCE devices, and the inability to re-render the recorded files into a different format to save space. With MythTV and Linux, on the other hand, we can capture, re-encode and playback on completely separate machines, even Windows systems. For the truly crafty, Myth allows us to connect the front end of a different machine to the first MythTV system and play video files/streams in that manner.
These are all functionality comparisons that we will get into more in Part II, so stay tuned and get ready to see if our little Linux experiment can take on Microsoft's best.


