Original Link: https://www.anandtech.com/show/1572
MGE Viper: Another Xtreme Gamer Creation
by Purav Sanghani on December 18, 2004 5:14 PM EST- Posted in
- Cases/Cooling/PSUs
Introduction
Our first look at an MGE case was the Sidewinder in their Xtreme Gamer line of gaming chassis. For about $57, at the time of publication of this article, we can get a case with a few modifications like a side panel window, a few LED fans to light things up, a high gloss paint finish, and an optional power supply from MGE. This is not a bad deal for those seeking a simple steel case with a few custom modifications to add some glamour to their desktops.Some, however, look at these factory modifications and make their decisions based on only the modifications instead of the overall quality of the chassis. We should always look at a product as a whole to make decisions on what to buy.
We have had a chance recently to look at another gaming chassis from MGE's XGbox division, the Viper. We opened the box and found a case heavily modified with a custom paint job, custom molded bezel and many other features. Take a look at some of the pros and cons of the Viper.
| MGE Viper | |
 |
The Good |
| + Integrated backlit LCD temperature display + Included Vigor 450W power supply + Clean construction, no sharp edges |
|
| The Bad | |
| - Lack of tool-less features - External visuals may not appeal to some - Power/HDD LED location |
|
As we get ready to dig deeper into the Viper, we must keep in mind that looks aren't everything, as we hope everyone understands, and that you wait to make a decision until the end of this review, after we have checked out all of the Viper's features and functions in detail.
More information is available on the Viper at MGE's XGbox website.
External Design
The visual design of a chassis can be simple yet elegant or extremely detailed and heavily modified from the factory. No matter what the case is, personal preference plays a large role in whether the case will be accepted by each individual user. Many prefer that we review cases based solely on how they look instead of looking inside to the guts of a product to see how they perform. We ourselves at AnandTech have our own opinions when it comes to the looks of certain products, but we try to go deeper into it to see what makes the case worth investing in or else, what changes can be made in future models.MGE's XGbox line of gaming cases takes their reference designs and adds custom-molded bezels and custom-designed side windowed panels to give consumers various options from which to choose.
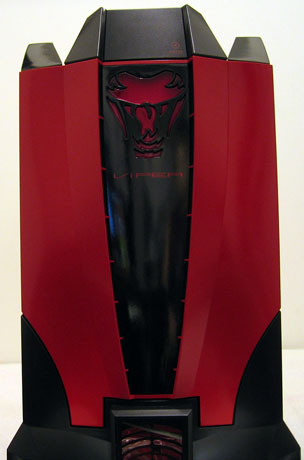
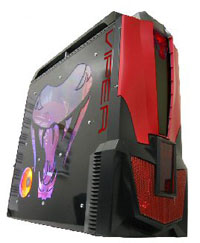
The Viper's front bezel is a custom-designed piece made of plastic that features a two-color combination of, in this test case, red and black. MGE carries on these colors throughout the chassis and we will seldom see a section of unpainted metal. At the top of the bezel, we noticed the sinister Viper logo, which is red on black at the center on the horizontal. The logo will light up when the system is powered.
Towards the bottom of the bezel, we see a large rectangular LCD temperature display, which features a system up-time counter, an animated Viper logo, and a single temperature readout. The temperature lead can be attached to any component, but we prefer to attach it to the CPU, since it is the most critical component. We would have liked to see a full-featured temperature display, which could keep tabs on more than just a single component to get a better idea of how each piece of hardware is performing in the area of heat dissipation.
Right click hereto play video.
Below the LCD display is a grill that allows air to be pulled in. We hope to see an air filter to keep dust and debris from entering the chassis.
Enternal Design (cont'd)
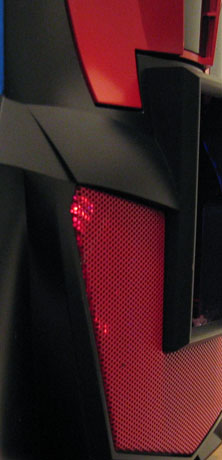
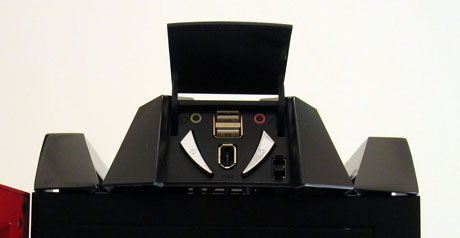
At the top of the Viper, we immediately noticed two rails on either side of the case. They are placed there to be used as handles so one does not strain his or her back lugging the case from one place to another. Well, not so much really. The rails extend from front to back and seem strong enough to withstand a great amount of weight.At the front of the chassis, at the top, there is a pod-shaped module that houses the auxiliary connections as well as the power and reset buttons. A small, push-to-open door hides these from view, which keeps the look as clean as possible. The back portion of that pod is vented, which MGE says will help cool the system. However, when drives are installed in the top-most bays, air flow to that area will be minimized significantly. The auxiliary module does not make much sense to be as big as it is and, in our opinion, takes up too much space on the outside of the case.
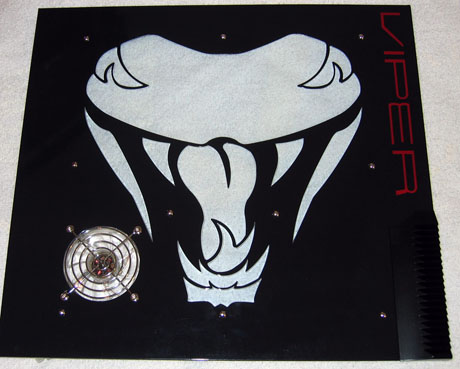
The side panels, especially the left side panel, are very exciting to look at. Though many will have mixed feelings on the art, we believe that the Viper logo window is a great added touch to the theme. Each side panel also features "Viper" printed towards the front of the panel, similar to the Sidewinder case.
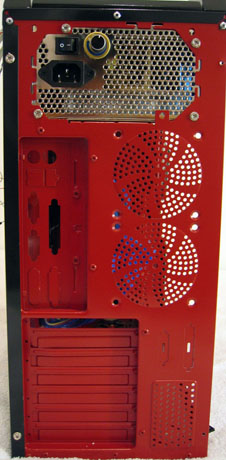
Looking at the backside of the Viper, we see the first signs of a well done paintjob. The entire backplane is painted red to match the color scheme of the Viper. We see mounts for two optional 80mm fans, which we will talk about later, a couple serial/parallel port cutouts, and a removable/replaceable motherboard backplate. MGE also includes a plastic "Static Wire Guard", which is meant to organize and protect the wiring from the system during mobility. We did not think that this was necessary, since wiring can still become tangled and be bent.
Internal Design
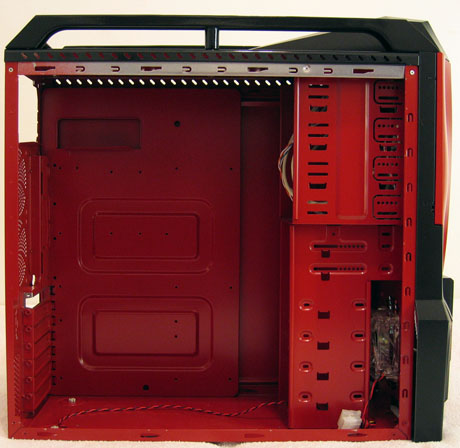
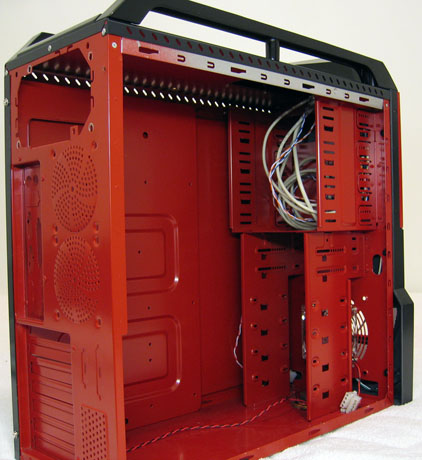
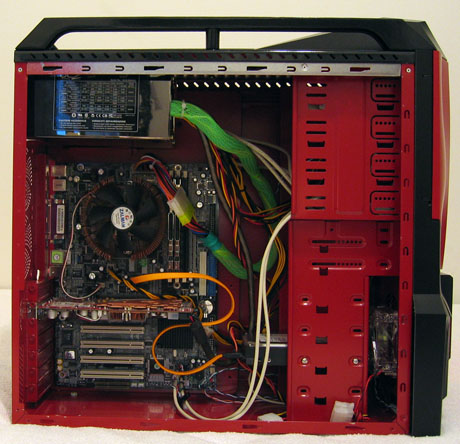
As we opened up the Viper, we were quickly blasted back to our look at the Sidewinder in mid-October. The Viper has the same internals as the Sidewinder in every aspect except the red paintjob (matching paint to the external shell), and we can, therefore, safely assume that they are both based on the same model.The internal structure includes drive bay mounts, which compose the entire front 1/3 of the chassis. There are a total of four 5-1/4" drive bays and six 3-1/2" drive bays, two of those being external for applications such as floppy drives, flash card readers, etc.
Also, just like the Sidewinder, the Viper has no tool-less features for its drive bays. Being a gaming chassis, we would expect MGE to implement even the simplest type of tool-less device. At the least, we would have liked to see thumbscrews for securing the side panels if not the drive bays.
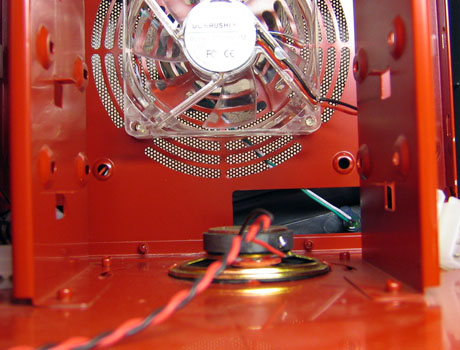
One thing that worried us was the placement of the case's PC speaker at the bottom of the case, vertically in line with the drive bays. This puts the magnet bearing speaker about 3/4" below the bottom-most HDD, which could lead to data corruption. We recommend that either users remove this speaker or MGE change their design and move it to an area away from the drive bays.
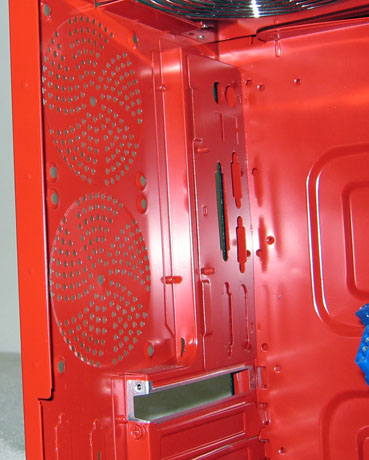
The Viper does have plenty of space to work with. Besides the space to add up to six 3-1/2" drives and four 5-1/4" drives, there is plenty of clearance between the motherboard tray and the drive bays, 2-1/2" to be exact.
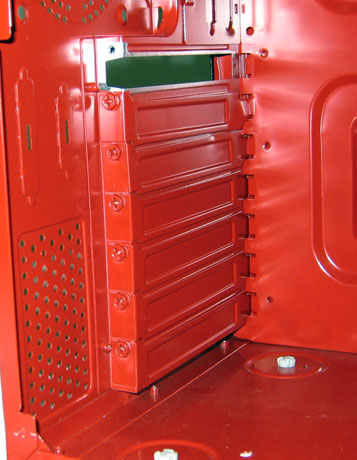
The expansion slots also lack tool-less features. MGE has kept the traditional Philips head mounting screw method to secure add-on cards to the Viper.
Cooling
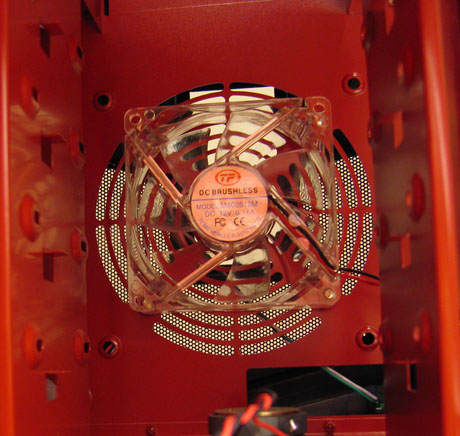
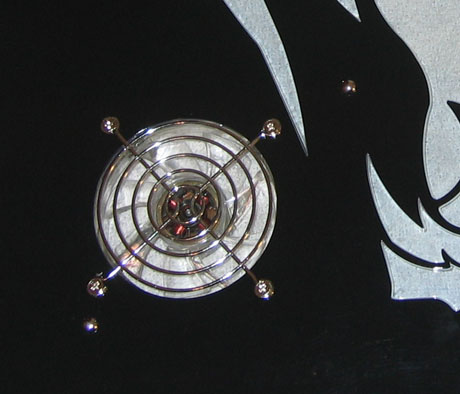
The Viper has a few different options in cooling when it comes to fan placement. Our unit shipped with two 80mm LED fans. The first fan is an intake at the front of the chasses toward the bottom of the case, which is standard nowadays. We also have the option of replacing the 80mm fan with a larger 120mm fan using the provided screw holes and larger fan grill on the chassis. A larger fan will also help cool the mounted HDDs better than the 80mm fan, which will only cover two of the four possible mounts.The second fan included with the Viper is also an intake and is mounted on the left side panel at the bottom left. This is also an 80mm fan and is covered by a standard silver steel grill to protect the blades from any unwanted contact. The fan is placed near the area of the expansion card area possibly to assist in exhausting warm air produced by the video card.
Two additional 80mm fans can be mounted at the back of the chassis above the expansion slots to increase air flow from front to back. If these fan mounts are utilized, we do recommend upgrading the front intake to a 120mm fan for maximizing the air flow.
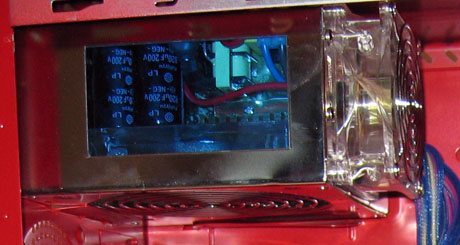
MGE has also included their own Vigor 450W power supply with our test unit, which has one 120mm LED fan at the bottom as well as an 80mm LED fan at the back. The unit is not SATA ready, but MGE has included two MOLEX-to-SATA power adapters. The unit also features a 6-pin motherboard connector aside from the standard 20-pin and 4-pin motherboard power connectors, eight MOLEX plugs, and two 4-pin floppy drive connectors. The MOLEX plugs, called Ohm Legs, also feature an easy-off design that allows us to remove the MOLEX from a device by squeezing the flexible tabs instead of killing ourselves while trying to wiggle the plugs from the device and risking damage to them.
Note: Instead of the 450W Vigor PSU, MGE will bundle with the Viper a standard MGE 500W PSU.
Construction
The Viper's construction is, of course, similar to the Sidewinder's. To refresh our memories, the internal design is an exact copy, besides the paintjob. We found no sharp edges in the steel material, which is a sign that let's us know that manufacturing processes in steel have come a long way since our first steel cases.The external shell of the Viper is the only aspect of the case that differs from the Sidewinder. The auxiliary ports were also mounted on the right side of the case's bezel instead of utilizing space at the top of the case.
Motherboard Tray
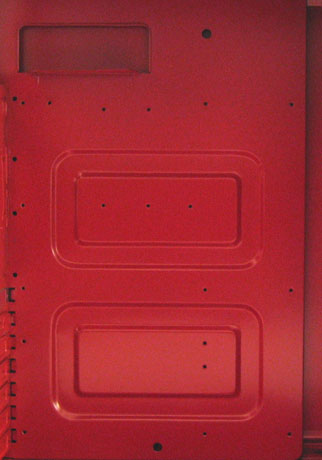
The motherboard tray is the same as that in the Sidewinder, since it has the same internal design. Again, we see no tool-less features here, like snap-on stand-offs that we saw in Thermaltake's VM3000A. Thermaltake's methods, however, didn't seem too appealing after a while, since removing the motherboard from the snap-in stand-offs was extremely tedious.There are plenty of screw holes to accommodate various types and sizes of motherboards from uATX to extended ATX form factors.
Installation
Since there were no tool-less features, the Viper took away about 15 minutes of our time for installation of our test bed. Though we are pretty quick with a screwdriver after reviewing multiple of tens of cases in the last few years, it does become tedious when we need to apply small screws for each component.Installation went smoothly, however, and we had no trouble with unnecessary wiring or clutter that we have experienced with cases such as Thermaltake's Damier or SilverStone's Temjin 5.
Benchmarking - Thermal
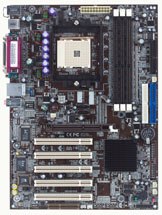
Describing the cooling equipment that comes with a case just doesn't cut it for us. We need to see how it actually performs to see if it is actually as effective as the manufacturer's say that it is. We have hand-picked a full system that we believe is the current system setup for the average user.| PC Mid-Tower Test Bed | |
Chaintech VNF3-250 |
 Click to enlarge. |
The thermal readings for the key components and points on the motherboard during operation were as follows. The numbers in each square represent the temperature of that particular section of the case in degrees celsius:
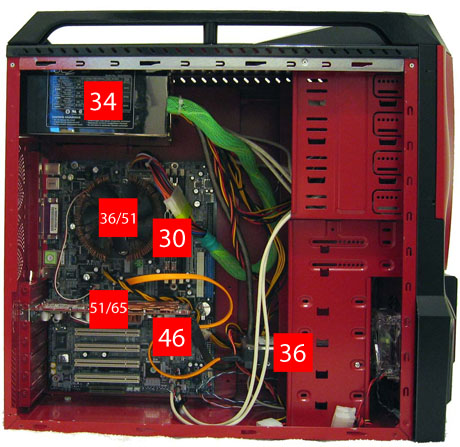
Click to enlarge.
Hold your mouse over to see hardware.
Temperatures of each key component remains close to the results that we have observed in the past few cases. There are slight variations in temperatures, but very little compared to the variations in ambient air temperatures.
Benchmarking - Sound
The other performance meter when it comes to cases is noise levels. We measure the noise level of the Viper 12" away from the closed chassis with the power supply and heat sink fans turned off. Take a look at our results.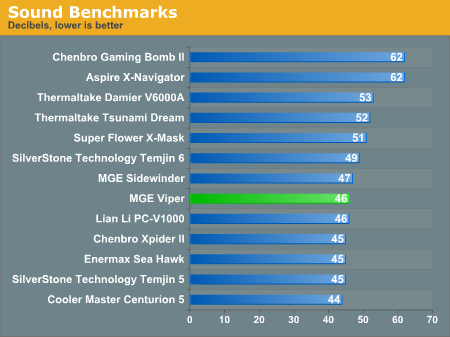
The Viper's two 80mm case fans produced noise at levels around 46dB, just 1dB lower than the Sidewinder, which had three of these 80mm fans. As we mentioned with the Sidewinder, adding an extra couple fans will most likely increase the noise levels upwards in the 50-60dB range.
Final Words
Who is the Viper marketed towards? In our opinion, MGE is targeting those consumers who want a wild look to their computer case, but do not want to spend hundreds of dollars in modifications. The Viper has a simple design, yet has the potential to outperform some of the more expensive cases on the market.Our thermal benchmarks showed that the Viper can compete with any high end case when the cooling system is utilized to the fullest. It comes with two 80mm fans, but adding more fans as well as upgrading the front intake to a 120mm fan can greatly increase performance, bringing ambient temperatures down as much as 5 degrees and certain core component temperatures down a few degrees themselves.
While adding fans may be good for keeping temperatures stable, noise levels will definitely increase if high quality fans are not used. The Viper produced about 46dB on average with just two 80mm fans. Adding a few more would most likely increase noise levels past the 50dB mark and possibly closer to 60dB if the right fans are not chosen.
As far as the looks go, everyone will have a difference in opinion. Either we will like the look or not. What really matters is what we really need and how much we are willing to spend on it. There is no doubt that there are other products out there that have features such as tool-less drive bays and expansion slots as well as removable motherboard trays and even a sleeker looking bezel. Adding a power supply may not be enough to bring a modified case to users' homes. Most of us just want a case that has been carefully planned in the design phase. We want a case that will tend to our needs as daily users and not have unnecessary modifications to distract us from our daily work.
With MGE's 450W Vigor power supply, the Viper has a price of about $90 at this time. For about $30-$40 less, we can get our hands on the Sidewinder, which has the same features with more fans, and as users in the field of IT, we could not choose this case over a simpler looking model.

