Xaser III Aluminum: ThermalTake drops Chenming
by Kristopher Kubicki on February 20, 2003 6:39 PM EST- Posted in
- Cases/Cooling/PSUs
Construction Continued
Click to Enlarge
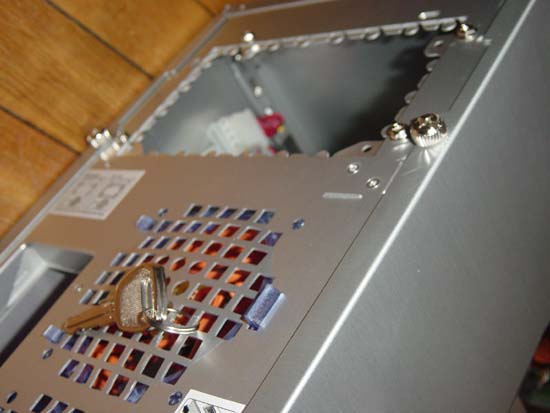
We heavily criticize cases with sharp edges. Case manufacturer have gotten a little better over the last year, but many still incorporate lazy finishing methods or poor folding techniques which result in bloody knuckles. Usually if we try hard enough we can find an edge that is not folded enough or possibly unpolished. No where could we find even a slightly unpolished piece of metal on the V2000A. Places that traditionally can pinch a digit all were buffed or folded. We paid particular attention to the hard drive bays to make sure we there were no areas that would result in a pinch or stray cut.
Our first surprise came when we realized that the hard drive bays were not removable. Almost every high end case we have ever looked at incorporated some sort of removable hard drive bay. Closer inspection revealed many details about the new bay design with both advantages and disadvantages. On the pro side, the mounting has been replaced with a completely screw less design; definitely something other hard drive mounting techniques have lacked. Furthermore, the bay has also been rotated to face the side panel. We found that the rails have no problem accepting double sized hard drives, like the 10000RPM Seagate we use in our benchmark. Quite frankly, this new radical design works extremely well. Unfortunately, there exists a pitfall in the design of the new bay.
Click to Enlarge
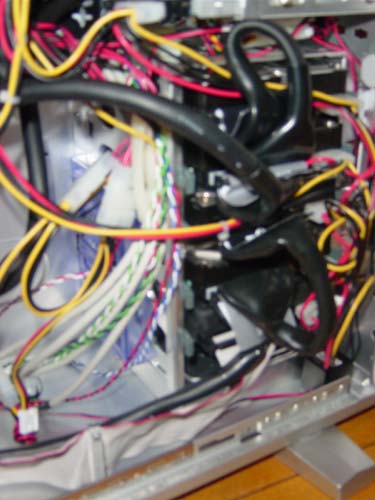
When connecting a single double height SCSI hard drive for the benchmark of this review, we encountered no problems. Unfortunately, when we attempted to connect two drives on the same IDE cable, we realized that the standard 18” IDE cable would not reach from the motherboard to both hard drives. Apparently, when the design team extended the rear of the case, they pulled the motherboard two critical inches away from the drive bays. If the drive bay was not rotated on the side, we probably would have been able to stretch the 18” IDE cables to connect. The only apparent remedy for this problem is to buy longer IDE cables; 24” or longer should do it.
On the other side of the front panel, we found two 80mm ThermalTake 8025A intakes. It looks like as though the fans are positioned directly in front of the hard drives, and should result in ample cooling. We will explore this more when we get to the benchmark section of our review. With the tool less theme of this case, the filters can be removed and cleaned without using a screwdriver. ThermalTake used the same fans throughout the entire case, using the same 80mm fan for exhaust and input. With a theoretical max air flow of 37 cubic feet per minute, we are anxious to get our Xaser III fired up and running. However, we are worried that the 7 fans, each putting out 30dBA, would result in a very loud case.
Click to Enlarge
The upper portion of the chassis depends on a similar plastic rail system for the 5.25” bay. The only components that require tools to install are the 3.25” bay external devices (Zip drive, floppy drive, etc). Other mentionable construction components include an expandable power supply shim. We noted a similar feature in the Xaser II, where larger redundant power supplies could be adapted to fit in the case by removing the shim. Although we do not see an immediate need for such expansion, the expandable comfort is always welcomed.


1 Comments
View All Comments
Aikouka - Thursday, March 11, 2004 - link
Trust me, it's not impossible to break the side door off this model. I bought it the day it came out from newegg and received no instructions. The model comes with the side panel locked, and I thought it was stuck, since I wasn't used to such a fancy case. Well, I broke the lock off and it was *not* hard. The plastic thingy literally breaks off and the weird metal piece just falls down. Definitely needs a better locking mechanism and some instructions shipped with it.