BitFenix Outlaw: When Inexpensive Doesn't Mean Cheap
by Dustin Sklavos on December 23, 2011 5:00 PM EST- Posted in
- Cases/Cooling/PSUs
- mid-tower
- bitfenix
Assembling the BitFenix Outlaw
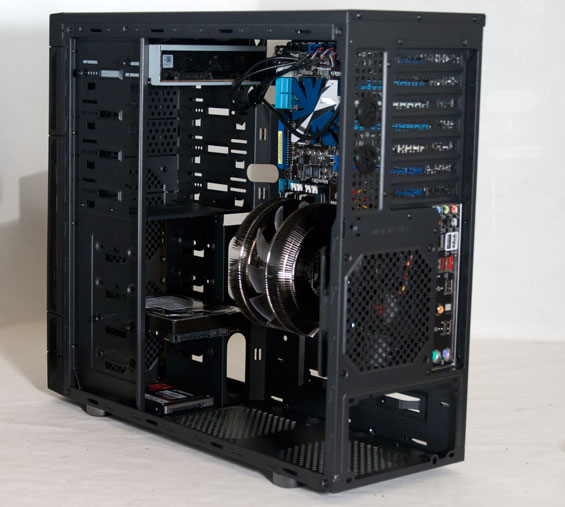
Installing our testbed into the BitFenix Outlaw was at least a little bit involved, but that's due more to the cramped quarters stemming from the smaller enclosure design than anything else. What's important is that BitFenix makes the most of the Outlaw's relatively small real estate (at least, small for a full ATX case).
Slotting the motherboard in was easy enough, though I'm finding the I/O shield for our testbed has seen better days. BitFenix has a couple of motherboard standoffs already installed. Our CPU cooler doesn't quite line up with the 120mm exhaust fan, though I'm not sure I know of any that would; the fan's placement is a bit low. The mounting holes surrounding the board are remarkably small but surprisingly good for keeping cable clutter contained.
Since the case is inexpensive, the "tool-less" drive installation really just boils down to thumbscrews. BitFenix includes thumbscrews designed for the smaller threading of optical drives as well as larger ones designed to fit into the rubber-grommeted bottom two hard drive bays (they'll also fit in the top bays). Our Blu-ray drive is on the long side and does overlap the side-mounted SATA ports a little, though, and the hard drive encroaches a bit over the bottom fan mount.
Honestly I'm not a big fan of bottom fan mounts anyhow; with rare exception (SilverStone's rotated enclosure designs like the FT02) I don't see these getting any use as most cases just aren't designed to sit high enough off of the floor (usually carpet). Compounding that is the fact that they're usually not far enough from the power supply; our 180mm power supply actually encroaches enough on the mount to prevent you from putting a fan there, and 180mm isn't an unusual or excessive length for a power supply. But I digress; installing the drives was easy enough to do, although the 2.5" SSD needs to be mounted to the bottom of the case as it has no "bay" of its own (or you'll want to buy a 2.5" to 3.5" adapter sled). Not a big deal, but it warrants mentioning.
Expansion cards require popping out the slot covers cut from the frame of the Outlaw. The steel used here is especially thin and fragile, pointing to a place where costs are liable to have been cut in manufacture. Sometimes that's not all bad, though; twisting the slot covers out was a lot easier than it usually is. Finally, sliding the power supply in was also pretty easy.
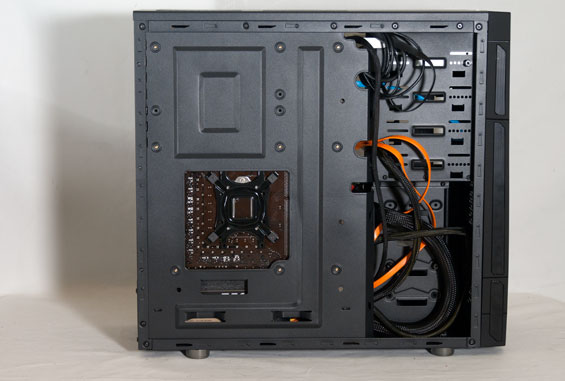
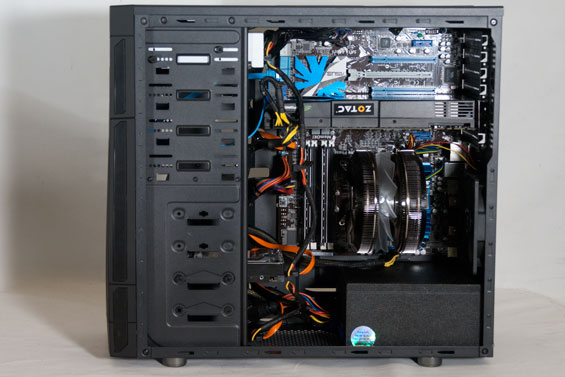
Wiring things up was a little bit trickier, though, and part of that is just due to the nature of a small case. Surprisingly, where Rosewill fouled things up with the Ranger, BitFenix gets the cable organization right; mostly it's just a matter of threading everything through the mounting holes in the motherboard tray. Having a modular power supply certainly helped (although AUX 12V clearance is at an all time low), but if you're spending $50 on a case chances are you're not up for splurging on modular kit either.


I'm mostly happy with the Outlaw's assembly. The interior winds up being impressively clean given the circumstances, as you can actually use the mounting holes under the hard drive cage to keep power cables pinned into place. There are certainly easier enclosures to build in, but very few of them are this inexpensive.


23 Comments
View All Comments
colmiak - Saturday, December 24, 2011 - link
yay! :)xbournex - Saturday, December 24, 2011 - link
Hi colmiak,The logo seen on the bottom is just a sticker (as an accessory) that we provide, just like the merc.
colmiak - Saturday, December 24, 2011 - link
thank you!gonna be picking up one of these soon at my local microcenter, looks so much nicer than the antec 300 for the same price!
and it's quiet :) !
Malih - Saturday, December 24, 2011 - link
i'd buy a premium but smaller version of this case, for mATX board, with better cable routing, and different angle for mounting hdd with detachable hdd mounting, with no 5.25 bay or just one of them but with a 3.5 adapter provided plus eSATA and USB 3 front panel.Well, just a little christmas wish...
Dustin Sklavos - Saturday, December 24, 2011 - link
SilverStone Temjin TJ08-E. We reviewed it this year. :)Malih - Saturday, December 24, 2011 - link
Never noticed the Temjin case is also left-handed, should've paid more attention, thanks.buzznut - Saturday, December 24, 2011 - link
I've been impressed with this enclosure since I first saw it online. It really is a great budget case and I can't wait to order one and begin a mod with it.Of course I have to put in a window to show off the right side up video card!
BTW, if readers want to pick one up in the US, visit www.Xoxide.com. I've actually seen it below MSRP, for $48.00.
rockfella79 - Monday, December 26, 2011 - link
Real VFM cabbie. Only one CON : No USB3.xbournex - Wednesday, December 28, 2011 - link
USB 3.0 Kit is available for purchase now.geniekid - Tuesday, December 27, 2011 - link
FWIW, you can purchase these cases directly from their website.