BitFenix Outlaw: When Inexpensive Doesn't Mean Cheap
by Dustin Sklavos on December 23, 2011 5:00 PM EST- Posted in
- Cases/Cooling/PSUs
- mid-tower
- bitfenix
Assembling the BitFenix Outlaw
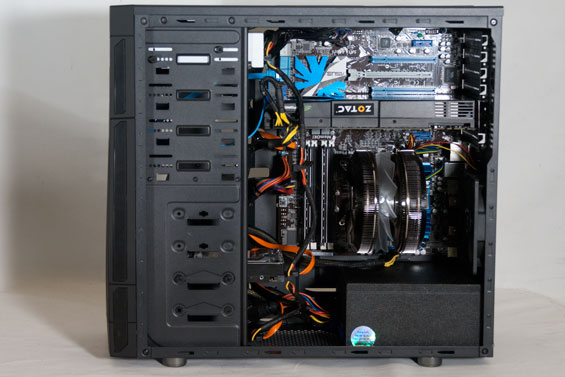
Installing our testbed into the BitFenix Outlaw was at least a little bit involved, but that's due more to the cramped quarters stemming from the smaller enclosure design than anything else. What's important is that BitFenix makes the most of the Outlaw's relatively small real estate (at least, small for a full ATX case).
Slotting the motherboard in was easy enough, though I'm finding the I/O shield for our testbed has seen better days. BitFenix has a couple of motherboard standoffs already installed. Our CPU cooler doesn't quite line up with the 120mm exhaust fan, though I'm not sure I know of any that would; the fan's placement is a bit low. The mounting holes surrounding the board are remarkably small but surprisingly good for keeping cable clutter contained.
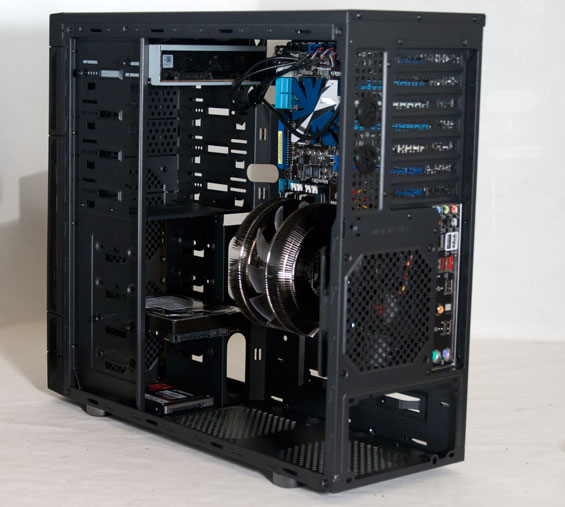
Since the case is inexpensive, the "tool-less" drive installation really just boils down to thumbscrews. BitFenix includes thumbscrews designed for the smaller threading of optical drives as well as larger ones designed to fit into the rubber-grommeted bottom two hard drive bays (they'll also fit in the top bays). Our Blu-ray drive is on the long side and does overlap the side-mounted SATA ports a little, though, and the hard drive encroaches a bit over the bottom fan mount.
Honestly I'm not a big fan of bottom fan mounts anyhow; with rare exception (SilverStone's rotated enclosure designs like the FT02) I don't see these getting any use as most cases just aren't designed to sit high enough off of the floor (usually carpet). Compounding that is the fact that they're usually not far enough from the power supply; our 180mm power supply actually encroaches enough on the mount to prevent you from putting a fan there, and 180mm isn't an unusual or excessive length for a power supply. But I digress; installing the drives was easy enough to do, although the 2.5" SSD needs to be mounted to the bottom of the case as it has no "bay" of its own (or you'll want to buy a 2.5" to 3.5" adapter sled). Not a big deal, but it warrants mentioning.
Expansion cards require popping out the slot covers cut from the frame of the Outlaw. The steel used here is especially thin and fragile, pointing to a place where costs are liable to have been cut in manufacture. Sometimes that's not all bad, though; twisting the slot covers out was a lot easier than it usually is. Finally, sliding the power supply in was also pretty easy.
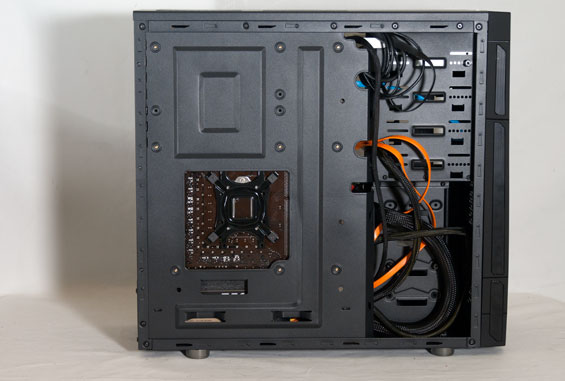
Wiring things up was a little bit trickier, though, and part of that is just due to the nature of a small case. Surprisingly, where Rosewill fouled things up with the Ranger, BitFenix gets the cable organization right; mostly it's just a matter of threading everything through the mounting holes in the motherboard tray. Having a modular power supply certainly helped (although AUX 12V clearance is at an all time low), but if you're spending $50 on a case chances are you're not up for splurging on modular kit either.


I'm mostly happy with the Outlaw's assembly. The interior winds up being impressively clean given the circumstances, as you can actually use the mounting holes under the hard drive cage to keep power cables pinned into place. There are certainly easier enclosures to build in, but very few of them are this inexpensive.


23 Comments
View All Comments
wutsurstyle - Wednesday, January 4, 2012 - link
Very good to see a setup where the motherboard is upside-down. Now those massive cooling pipes on video cards are rightside-up and more effective.binqq - Friday, January 6, 2012 - link
Our Website: ===== www fashion-long-4biz com ====Our main product list is as follows:
Zebble - Tuesday, January 24, 2012 - link
I wouldn't have even considered this case, but after reading the review I decided to try one. What a very pleasant surprise! Very well-built, and the rubber-like coating on the front face makes for a very impressive high-quality feel.The up-facing USB ports were the clincher for me, as I like to use a USB key off my keychain without having to detach it. Front-mounted USB ports left my keys hanging and pulling down on the USB key which can't be good for the USB key or the USB port! Up-facing USB ports
solve this problem...
I was also surprised at the quality hardware included. Almost all screws were thumbscrews, and even a hex-to-philips adapter was included to make installing the motherboard stand-offs a breeze. Haven't seen this in any other case I've purchased. Nice touch BitFenix!
Cable room/routing was very good. It's the cleanest build I've done because of all the cable room behind the 3.5" drive-bays. Again, nice touch.
Was so happy with the case, I snagged another the next day.