Intel Z87 Motherboard Review with Haswell: Gigabyte, MSI, ASRock and ASUS
by Ian Cutress on June 27, 2013 8:00 AM EST- Posted in
- Motherboards
- Intel
- MSI
- Gigabyte
- ASRock
- Asus
- Haswell
- Z87
- Shark Bay
- Lynx Point
ASRock Z87 Extreme6/AC Software
One area that ASRock needs to focus on more than any other is Software. In previous generations ASRock likes to push forward their XFast system – RAM, USB and LAN. Each of these technologies is always advertised as offering 5x performance, although specific selection of benchmark and testing for each often helps that claim. Over a number of reviews we always analyze these features, and all three can generate a positive buzz for ASRock. The only downside to the software package was, more often than not, everything else. In terms of fan controls, overclock options and monitoring software we were always left wanting.
For the Z87 platform release, ASRock have decided to re-skin their software to bring it more into this decade. Instead of the ASRock Extreme Tuning Utility (AXTU), we get A-Tuning, which opens up with automatic overclocking options:
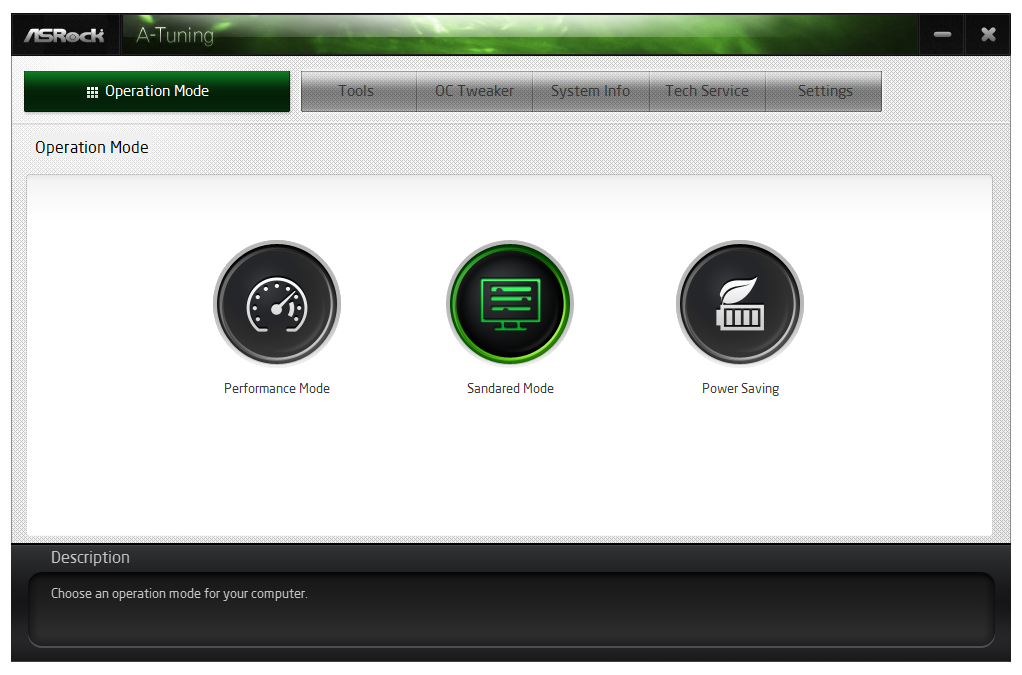
By default we are in ‘Sandared Mode’ [sic] which is the default method of operation. In Performance Mode the system essentially moves into ‘High Performance’ power mode, offering 39x CPU multiplier at both idle and any core loading. In Power Saving mode the system reduces to 8x when idle, and then under continued load slowly ramps up the CPU speed to the full 39x. This process takes about 5-8 seconds of constant load to reach the top speed ensuring that short operations do not cause the CPU to draw a lot more power than required. When Performance Mode is selected, an additional option ‘Auto Tuning’ is given which performs a tuning based automatic overclock – we go over this operation in the Overclocking section.
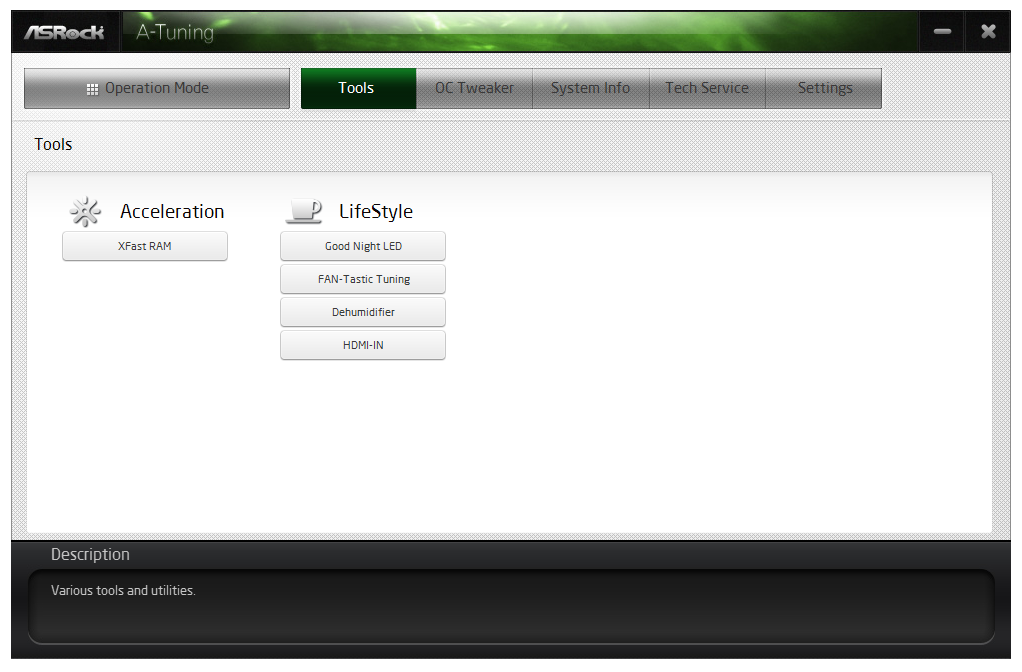
The Tools menu is next, and l would assume by the amount of whitespace and the size of the buttons to be the area where future ASRock ideas are implemented:
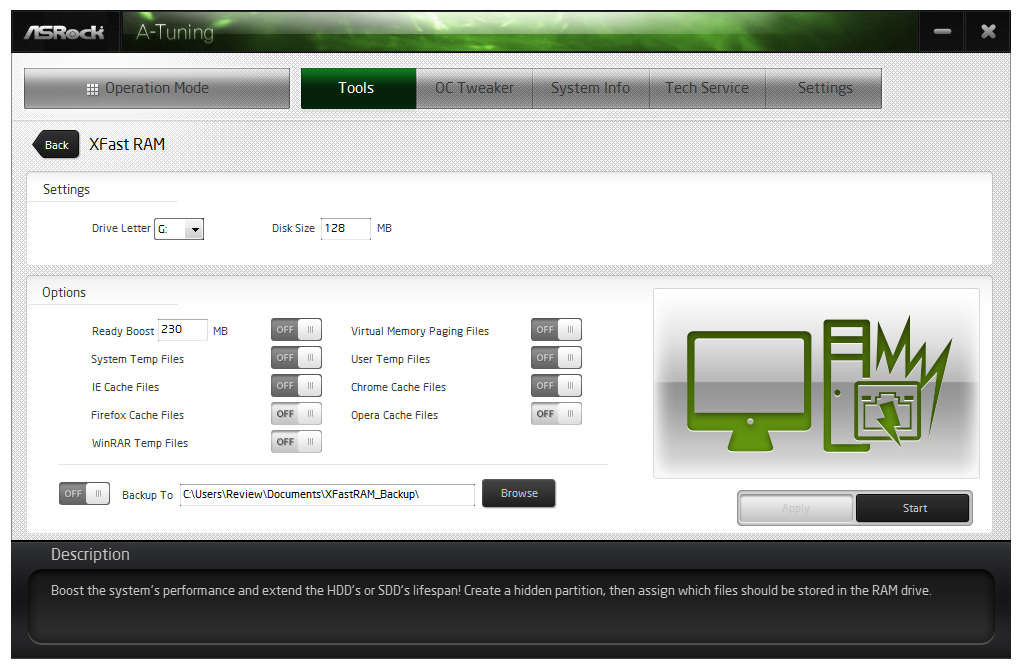
X-Fast RAM
The first up is XFast RAM which gets a new interface but performs much the same operation as last generation – partition an amount of memory off for cache and temporary files.
Good Night LED
The Good Night LED menu option allows users to disable any lights on the motherboard or connected to the motherboard when the system is in operation. This allows users who have to leave their PC running overnight in the same room in which they sleep to not be distracted by the lights on their PC.

FAN-Tastic Tuning
In order to mitigate the noise of the fans, or produce a fan profile suitable for overclocking, ASRock have a fan control system that actually implements how a fan control system should work, even on 3-pin fan headers!
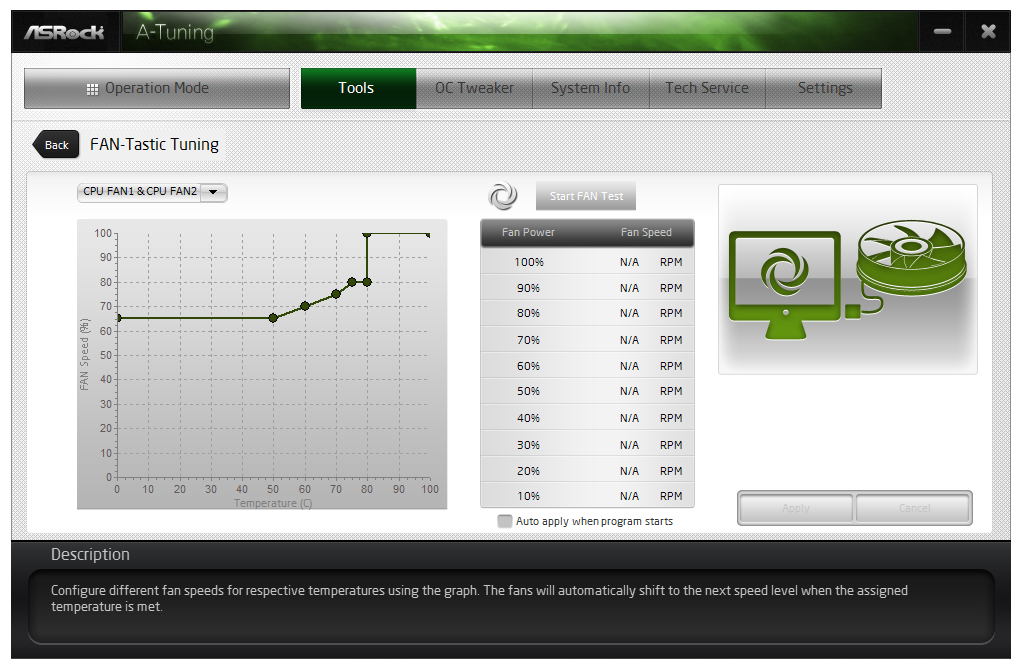
With the fan options, users can get the software to test the fan to find its power-to-RPM profile which ASRock then translates through software into an 8-point gradient graph of Fan Speed vs. temperature. This is 95% of what fan controls should be! The only thing missing is a small amount of hysteresis – fan speeds are kept at the high speed as the system cools down in order to help the system to cool down quicker.
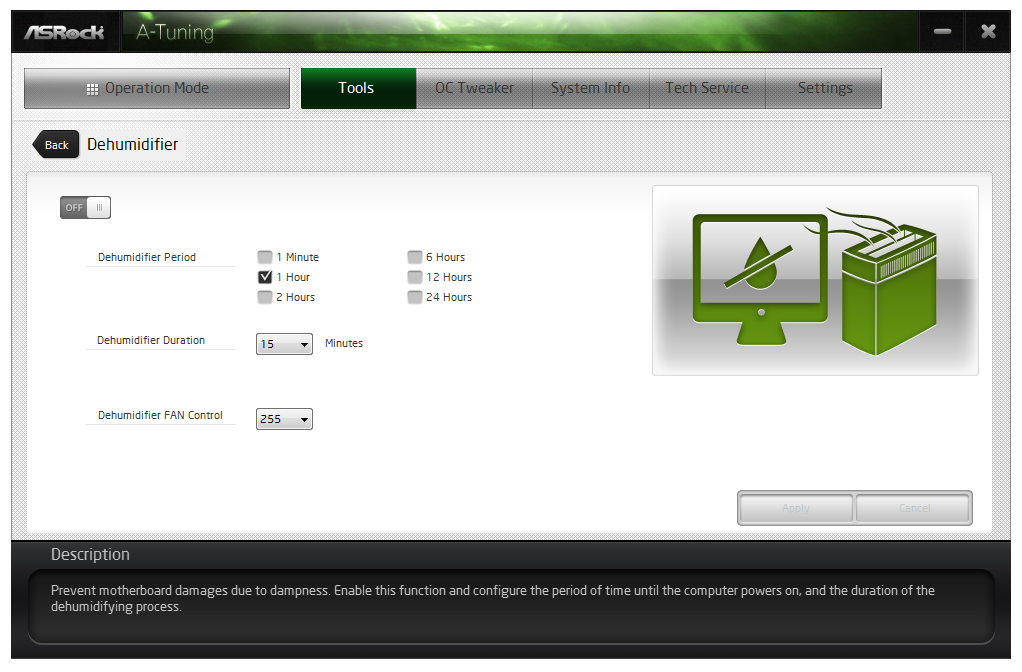
Dehumidifier Function
The Dehumidifier function is one from last generation, offering users in humid climates to keep the fans attached to the motherboard on for a fixed amount of time after the PC is shut down. This allows the air inside and outside of the case to equilibrate faster – users in these climates can suffer from condensation if the air in the case cools down and the water saturated air causes the water to form droplets on the inside of the case. This function helps keep the temperature inside and outside the case constant after shutdown, meaning if there is an issue for condensation it would apply to the whole room, not just the case.
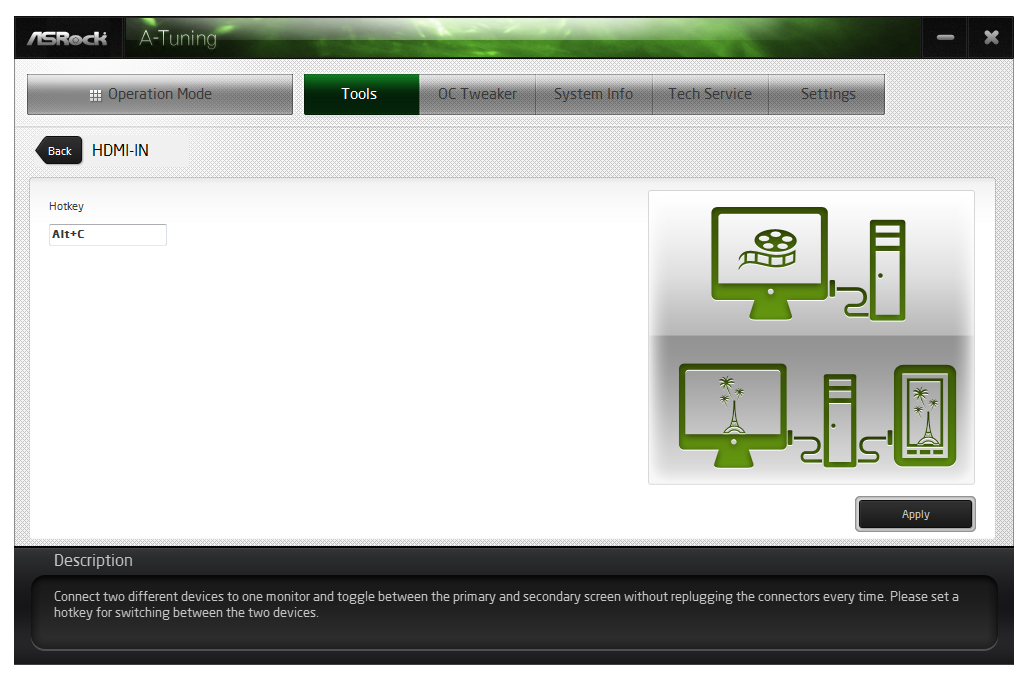
HDMI-In
One of the new features on ASRock’s motherboard range is the inclusion of a HDMI Input on the rear IO. The purpose of this is to have an all-in-one entertainment system on the desk. Imagine having a PC and a console on the desk – this would require two inputs into the monitor plus extra cables around the rear of the monitor. With HDMI-In we can plug the console into the PC and then use a hotkey in the OS to switch between the two. I was unable to test the feature as I do not own a console (I sold them all), but one thing about the HDMI-In software I found was that there is an invisible window present at run time. This can affect options such as ‘Show Windows Side-by-Side’, as it includes this invisible window. It is also selectable by alt+tab.
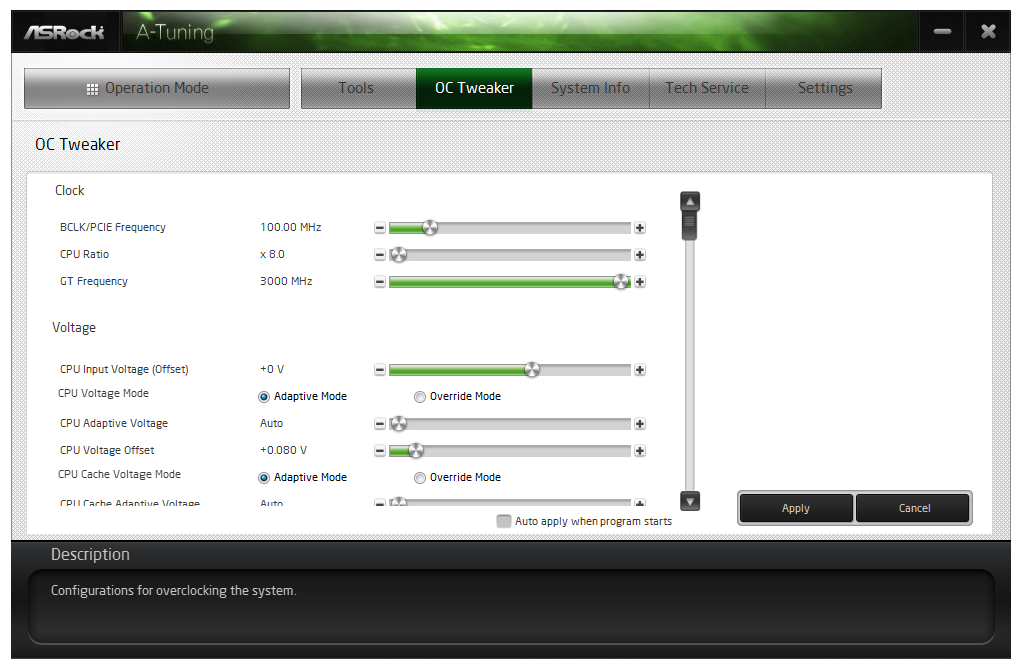
OC Tweaker
For manual overclocking in the OS, ASRock has skinned its OC Tweaker in the new style. I like the fact that the options are now easier to see and manage, although ASRock are missing the ball by not including the ‘current’ values alongside the ‘adjusted’ ones. This would allow users to see what is currently selected against what is currently applied. A lot of motherboard manufacturers are also offering inputs by typing as well as sliders, which is something that ASRock may want to look into for the future.
The information for the system is under System Info, which acts more like a Hardware Monitor:
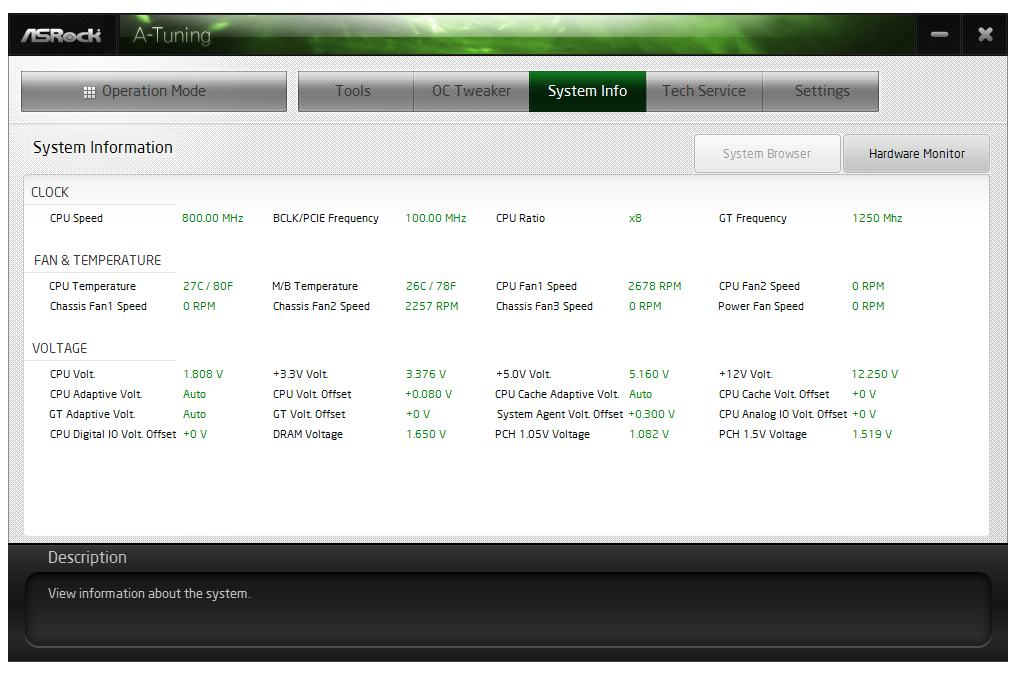
One obvious flaw I spotted is the CPU Voltage reported. As in the screenshot above, it shows 1.808 volts, which is more likely the CPU VIN voltage (from the FIVR) rather than the voltage actually being applied to the CPU. This was endemic of a wider problem in that there was no software tool I could use to detect the real voltage, indicating this is more likely a BIOS issue rather than a software issue. I suspect that this error would be updated in the latest versions of the BIOS and software.
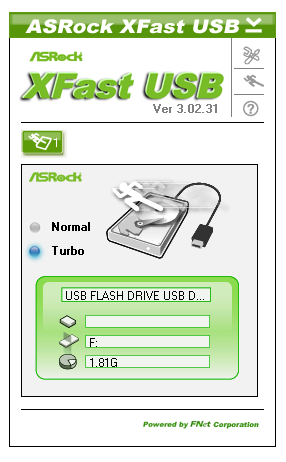
XFast USB
One of the more long-standing positive features in ASRock’s product stack is XFast USB. The premise is simple – the Windows 7 USB driver is not as optimized as it could be. With XFast USB ASRock are implementing a BOT driver to both USB 2.0 and USB 3.0 which improves USB peak speed at the expense of latency. In our USB testing we see this as a large improvement in terms of both peak and real-world speeds.
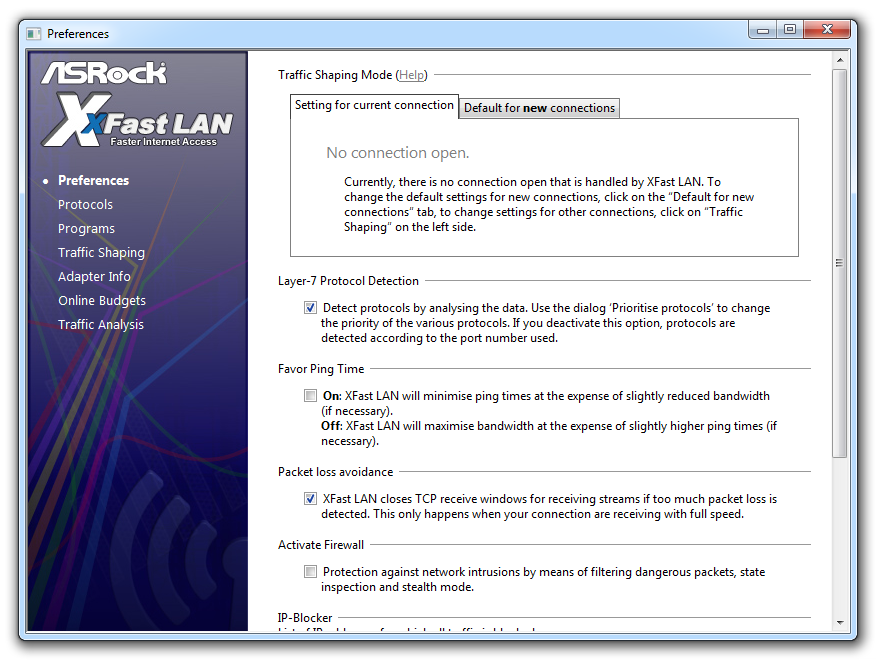
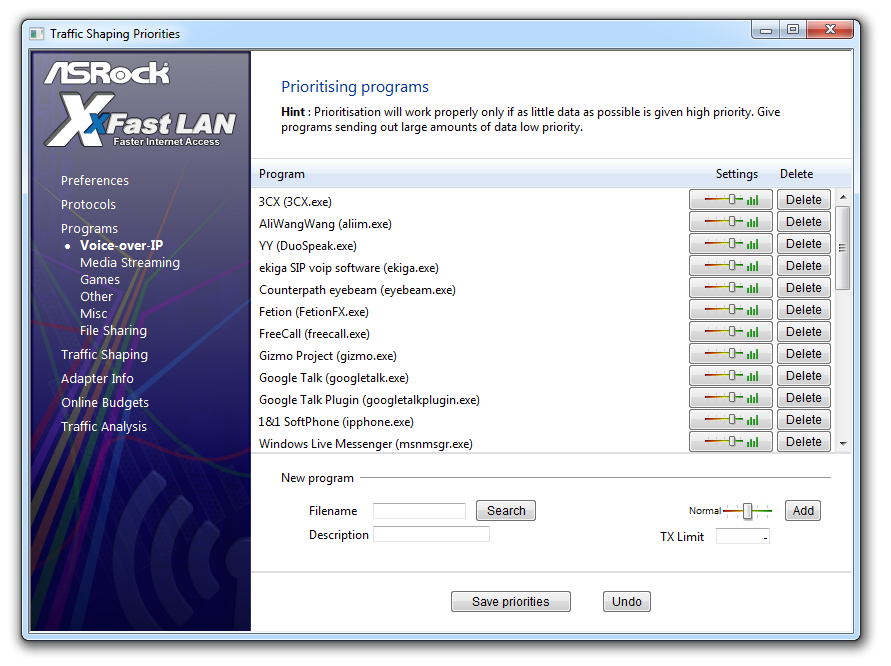
XFast LAN
ASRock bundle a licensed and skinned version of cFosSpeed to help with network management. XFast LAN allows users to give certain programs a higher priority over others, meaning they are rearranged in the Windows network stack appropriately. XFast LAN also offers extensive analysis of network traffic, although as this is all a software implementation, could arguably increase CPU loading.


58 Comments
View All Comments
ShieTar - Thursday, June 27, 2013 - link
Is there a special reason not to test the POST times and DPC latency of the Gigabyte Board? Its power consumption is quiet impressive, and whatever design measures have been used to achieve it do not seem to negatively affect the overall performance. So it would be interesting to complete the picture with the two measurements which are missing.IanCutress - Thursday, June 27, 2013 - link
DPC Latency on the Gigabyte during testing was jumping around a fair bit, hitting 800+, though that is more likely due to the early BIOS revision. I need to run the POST test (as the results are strangely missing from my database) as well as the DPC test on a newer BIOS. Since I started testing almost every manufacturer has released newer BIOSes (as is always the way coming up to a launch) and I really have to lay the hammer down as testing a whole new BIOS takes a good 30 hours or so start to finish, so when I'm locked in that's it. That in a way does give an unfair advantage to the board I test last, but there's not a lot else I can do. I am still getting emails of BIOS updates for these boards as of yesterday.Ian
tribbles - Thursday, June 27, 2013 - link
Am I wrong in thinking that Gigabyte hasn't been doing well in the DPC Latency Test since Z77? If so, that's kind of surprising, since Gigabyte seems to be a "go-to" brand for digital audio workstation builders.IanCutress - Wednesday, July 10, 2013 - link
I retested the UD3H on the F5 (public) BIOS, and it scored 164. The two next boards I have in for review got 160 and 157, which points fingers to the DPC on Haswell being 150+ regardless of motherboard. This might be a fundamental issue.Timur Born - Saturday, July 27, 2013 - link
Run Prime95 (or turn off CPU power features) while measuring DPC latencies to see how much CPU power saving features affect DPCs.jhonabundance - Thursday, August 28, 2014 - link
great share http://asus.comjhonabundance - Thursday, August 28, 2014 - link
this is the best share http://asus.comRick83 - Thursday, June 27, 2013 - link
Maybe a bad choice to use two different ways of graphing the Rightmark results.Being consistent with regard to cutting off the irrelevant bit of the graph makes it a much easier read.
Now it appears at first glance as though the Gigabyte board is much better in THD+N, simply because the differences were so minuscule in the dynamic range bit.
On another note: Shouldn't it be more interesting to use a standardized input instead of the input of the board? In the current protocol a good output could be handicapped by a bad input, and conversely. For most users the output is much more important than the input, so it might be better to test it independently? I would recommend using a USB soundcard as an easy means of doing this test on the same machine, without changing the setup protocol too much.
And finally - I seem to remember Rightmark results for earlier reviews - it would be interesting to have those (or maybe a reference soundcard?) as comparison in the same graph. After all, for DPC you maintain a large cross-platform table as well.
Nice thorough initial review, those nitpicks withstanding.
IanCutress - Thursday, June 27, 2013 - link
Unfortunately I can't adjust the engine to represent from 0 for negative values, I don't have access to the low level options. I forwarded it on as an issue.I'd love to use a standardized input with RMAA. I guess it would be good to get a sound card with an input that supercedes the output of the motherboard and put it through that way, and hopefully there won't be a driver conflict along the line. I'll see what I can do to get in the hardware for that, although many soundcards are designed more for output and the input dynamic range/distortion might be the limiting factor as is the case on motherboards. Something like the Xonar Essence STX has a 118 dBA input with -113 dBA THD+N which might be a good starting point.
Our RMAA testing for Z87 has changed a little from Z77 to make it more of an efficiency test rather than an out-the-box test as audio is such a varied playing field. RMAA is very sensitive to certain windows settings and volumes for example such that with the right combination it was very easy to show A>B or B>A depending on how the OS felt it should be set up. The new testing regimen for RMAA should iron out those issues but the results are not exactly comparable to Z77 for that reason. There are so many wrong ways to set up RMAA it can be difficult (and a learning experience) to get it right.
Ian
popej - Thursday, June 27, 2013 - link
Nice to see you are planning steps in right direction. Using reference card for measurements is a proper solution. Be aware, that separate card add complications to the test, for example you will have to take care about ground loops and signal level matching. Professional card with balanced input could help a lot.